Portainer – An Easy Docker Management GUI

When it comes to managing docker on remote machines (or even on you daily machine), it it sometimes feels tiresome to remember all the docker commands and use them on day to day bases. Tools like portainer brings a life to the our daily activities which involves management of docker and containers and images and repositories. The focus of this post will not be the advance learning of Portainer, but sort of its setup and introduction of portainer basic capabilities.

Installation

If you go to official site you will see many ways a portainer can be installed. Since we are using the setup we have created in my previous post, we will use the standalone installation as Install Portainer with Docker on Linux. You will see the command listed over there to install the portainer as a docker container with in docker. That’s great … right? But wait, what we will do before that is create a volume and a network MANUALLY (I know we need portainer to get rid of all this hassle, but believe me there will all hassle free once our manual initial setup is complete). Just follow my lead and you will see that easy life.

So lets create a network by executing the below command.

$ docker network create learn-docker

this network will now have the ip range, from which we can choose an IP to be assigned to our container. While running the container, if we don’t specify the Network and IP address, then docker will use the default bridge network and next available IP address from the range in that network. Let’s figure out what IP range.

$ docker inspect learn-docker

it will give output something like this

[
    {
        "Name": "learn-docker",
        "Id": "97c7497ce58b152145075c9b136769cd9ab9594a7925611a92dadcc938a1d571",
        "Created": "2022-09-02T10:50:50.780728238+05:30",
        "Scope": "local",
        "Driver": "bridge",
        "EnableIPv6": false,
        "IPAM": {
            "Driver": "default",
            "Options": {},
            "Config": [
                {
                    "Subnet": "172.18.0.0/16",
                    "Gateway": "172.18.0.1"
                }
            ]
        },
        "Internal": false,
        "Attachable": false,
        "Ingress": false,
        "ConfigFrom": {
            "Network": ""
        },
        "ConfigOnly": false,
        "Containers": {},
        "Options": {},
        "Labels": {}
    }
]

Notice the Subnet and Gateway properties in the output above. By this configuration any container joining in that network will get an IP from range 172.18.0.2 and 172.18.255.255.

Let’s move ahead and add a new volume for portainer by executing the following command.

$ docker volume create portainer_data

Now we are ready to install portainer. Execute the below command to install portainer.

$ docker run -d -p 8000:8000 -p 9000:9000 --network=learn-docker --name portainer --restart=always -v /var/run/docker.sock:/var/run/docker.sock -v portainer_data:/data portainer/portainer-ce:latest

By this time if you have started following the official documentation, you will notice that there they are using / exposing port 9443 in place of 9000. Please don’t bother that, as in future we will not expose that port from portainer anymore.

If the command was successful, you will see a nice long ID like string in console. Lets see the status of the portainer container by running following command.

$ docker ps

If the portainer is successfully installed and running, you will see that entry in the output there.

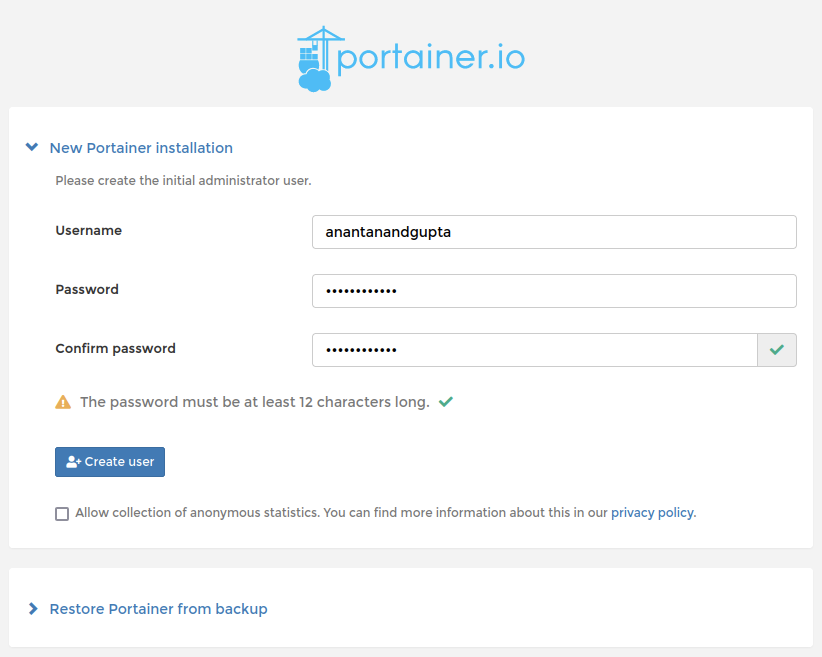
Open a browser window and navigate to http://localhost:9000. You should see screen to create your first admin user like below. Create your credentials and remember them / save them for the future use.

New Portainer Installation

In case you see the screen something like below, just restart your portainer container by issuing the below command and refresh the page.

portainer installation timed out
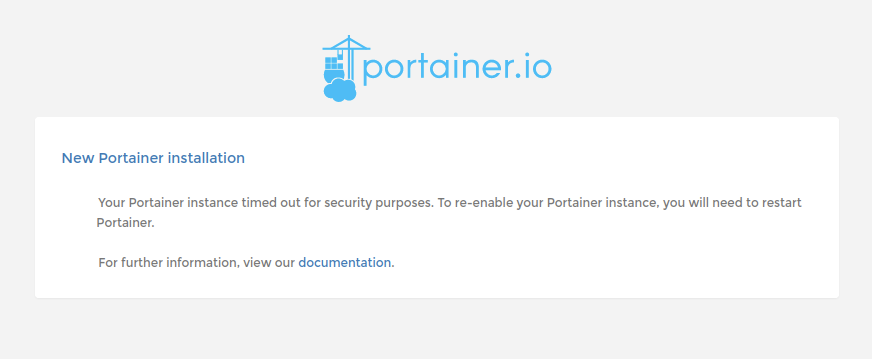
$ docker container restart portainer

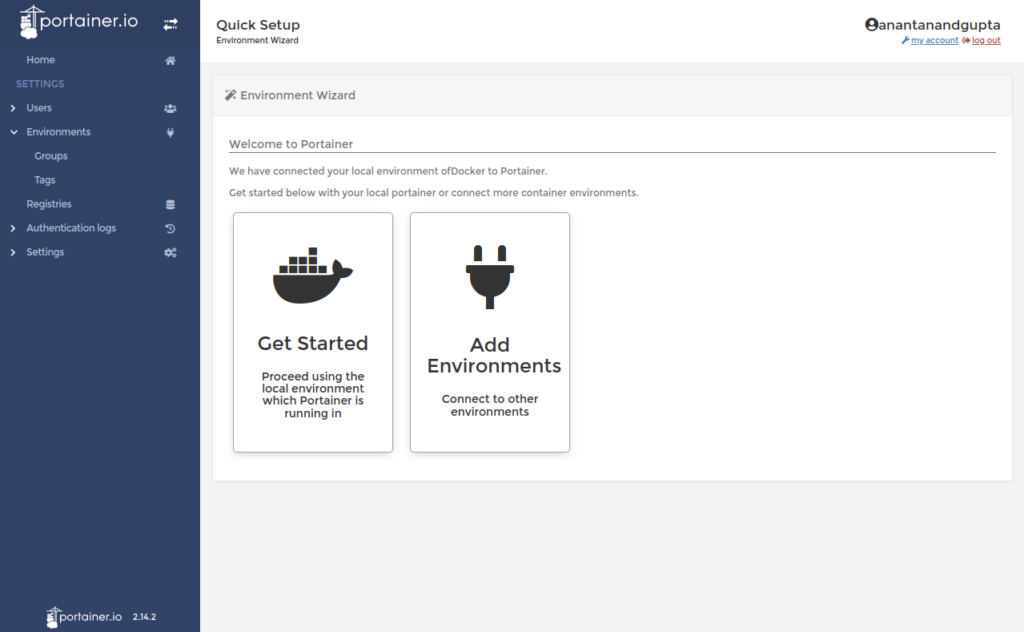
On successful admin user creation you will be presented with a screen similar to below, from where we start our next section of configuration.

Quick Setup – Environment Wizard

Setup Docker Desktop on Ubuntu for Beginners

Ubuntu is a versatile Operating System and when I started using it, I started needing it everywhere. I had windows in past and now I have Intel based macbook, but I always had a VM with Ubuntu. There are many things I would like to still do in Ubuntu, like setting up servers and clusters. Today when we talk about the docker setup, we will be talking about the same Ubuntu. For this post I will be using the Ubuntu VM setup in a VM hosted by VMWare Fusion. I will be using the current LTS version (22.04) of Ubuntu Desktop (this makes it possible to capture few screenshots for this post).

Prerequisite: VM Setup

In case you are interested in knowing how to setup a VM in fusion, you can search youtube (I will put some tutorial links here from my content as and when they are ready). For now you can read / watch my old post / video here, which is based on the Microsoft Windows edition of VMWare Workstation. In case you have a server host linke GCP, Azure, AWS or Linode you can create a VM there too, the choice is yours. The only thing you have to remember that if you are opting for the VM route, you will need to enable virtualization in the VM setting.

About Docker

If you guy are here then I am sure that you have a very basic idea about docker or have seen or heard someone talking about this. I am sure you are are amazed with their talks and are definitely interested in learning more about that. I am not going to touch in detail about docker in this post, but promise you that I will be posting more about Docker in future. For know, just understand in plan English that docker is a software which has the capability of running your applications in an isolation from the rest of the system (know as containers). It seems and behaves like tiny vm only but it is sharing the underlying infrastructure. In simple words it doesn’t virtualize the hardware at all.

Linux and Docker

These 2 systems walks hand in hand. Take Ubuntu (Linux) as host to run Docker to run containers which are based on linux based (though there are images of other OS too), images. I am sure there will be people coming back at me on the above statement, but believe me that the most beautiful marriage in the world ever. In case of server environments there are 2 major players (as host for docker), Windows and Linux. We will also be using this docker setup in future posts to set up various things and learn more. So, let’s get started.

Setup

By this point I am sure you already have an Ubuntu machine running somewhere (VM, Laptop, Cloud / Datacenter) and have been patiently waiting on the text above. So I will not waste anymore time of yours.

First thing First – Update

As a ubuntu user, I always prefer to run apt update before any software installation, which impacts the system. So open the terminal (press ctrl + alt + t)

$ sudo apt update

Start Setup

Now before we proceed, I need to tell you that I will be setting up a Docker Desktop edition, which comes with some ui to interact with (and take a few screenshots for this post). There is another variant which is generally used on the servers and have no UI (portainer a nice tool to know in case of docker setup on headless servers).

To get the docker desktop headover to the docker official website here. You will see the instructions over there and try to follow them here. In the beginning there are some instructions to remove the older version of docker engine in case you already have the installed (as innocent mistake while trying to figure out the length and breadth of docker by following some older posts / videos). You can skip those steps as in our case we have a fresh installation of the operating system (I am assuming). Since we have already updated the system we can directly run the below command in your terminal.

$ sudo apt install ca-certificates curl gnupg lsb-release

The above command will install some the required packages (don’t worry, in case you know that some these packages are already installed on your system). No create a foder for the keyrings as follows (again don’t worry in case you already have the folder on your machine).

$ sudo mkdir -p /etc/apt/keyrings

now get the GPG in that folder by executing the below command.

$ curl -fsSL https://download.docker.com/linux/ubuntu/gpg | sudo gpg --dearmor -o /etc/apt/keyrings/docker.gpg

Now it is the time to setup the repository using the command below

$ echo \
  "deb [arch=$(dpkg --print-architecture) signed-by=/etc/apt/keyrings/docker.gpg] https://download.docker.com/linux/ubuntu \
  $(lsb_release -cs) stable" | sudo tee /etc/apt/sources.list.d/docker.list > /dev/null

You are ready at this point to download and install Docker Desktop. But since we did some system changes like adding a new repository, we are required to run the apt update again. Remember that it may all fail if the above step is ignored or missed.

last command in preparation is as flows

$ sudo apt-get install docker-ce docker-ce-cli containerd.io docker-compose-plugin

Download the latest version of the Docker Desktop

Jump over to this link and download the DEB package by clicking the link provided on the page. I am not intentionally pasting this direct down link here is because, future readers may not find anything here, since the external site has updated the link. Once downloaded you will see the .deb package in the folder where you downloaded the file (default is Downloads folder).

Downloads in Firefox Library
files in the Downloads folder

Open that folder in terminal and execute the following command.

$ sudo apt install ./docker-desktop-<version>-<arch>.deb

Above command will take a few seconds to setup the docker desktop. You have successfully installed the Docker Desktop now. Before you run the application go ahead and restart the machine. Once the machine is restarted navigate to terminal and execute the following command.

$ systemctl --user start docker-desktop

Or you can find the docker Desktop application in your applications list, just click to open the same.

Docker Desktop Service Agreement Screen

That’s all folks, you have docker desktop running happily on your ubuntu machine. In case you have any questions, please don’t hesitate to put them in the comments. I will be happy to answer them all as soon as possible.

Thanks for reading!

How To: Install Ubuntu in VMWare Player

Install Ubuntu in VMWare Player

When someone is looking for a development or test environment where he don’t want to disturb his current setup by installing the additional software, the virtualization is the best thing, which comes in his mind. There are many virtualization platforms out there in the market like VMWare and Hyper-V etc. I use the VMWare extensively for my development environments, like PHP Development Environment or the SharePoint Development Environment.

In case you, are interested in similar sort of setup, all you need is to buy the VMWare Workstation (I personally recommend, get it from here) or use one of the many free / opensource virtualization platforms like VirtualBox. Here with this post I am demonstrating the setup of the Ubuntu (Download Ubuntu) Linux as guest OS in VMWare Player (it will be similar for the VMWare Workstation). You can follow the below video see the setup instructions.

As it is shown in the video above the installation steps are very much similar to the one which anybody will follow, while installing any OS in physical machine. The only thing which you need to learn is what should be the configuration of the Virtual Machine you are creating. There are people out there who use this kind of virtualization to even run a full fledged development environment. This helps them separate out there development environment with the general use environment, keeping there host machine neat and clean. One more benefit, as identified by many people is that you can easily migrate one environment from one machine to another machine with all its configurations.

Hope you will enjoy your virtual environment whether it is for development or testing or whatever purpose it solves for you.

How To: Setup PHP Development Environment in Ubuntu

Setup PHP Development Environment in Ubuntu

I have produced a video on how to Setup PHP Development Environment in Ubuntu Linux. It covers the below topics:

  1. Installation of Apache Web Server
  2. Installation of PHP
  3. Installation of MySQL Database Server
  4. Installation of Development Tools
    • MySQL Workbench
    • Komodo IDE

You can download the complete installation instructions here.

Please find the same video here:

Follow me :

youtubefacebooktwittergoogleplus

How To: Install PHP on IIS in Windows 8 Easily

install php on IIS

Install PHP on IIS in Windows 8

There are many people, who come to me asking, is there any simple way of installing PHP on my PC with Windows and IIS. The answer is, Yes.

Thanks to Microsoft for providing a great tool named Web Platform Installer. This tool is capable of setting up your machine for different tested and tried configuration. It can install many applications & packages. I always used this tool prepare the servers and development environment. However it has only one lack of feature, “Offline Installations”. I am still happy as most of the time when I am configuring the environments, the Internet is available and this tool can quickly download the latest one over the Internet. I have prepared a short video for the same.