
Manager Containers
This is going to be the biggest section of this post. There are lot of things which you can do with portainer and it provides many easy to do actions which are otherwise complex when using docker command line, as they may require you to perform multiple commands to complete the same. the biggest example of the same is to update the container to the latest image. (though this comes with its own risks and issues). Let’s begin with navigating to the containers from the left navigation or from the tile on the environment dashboard.
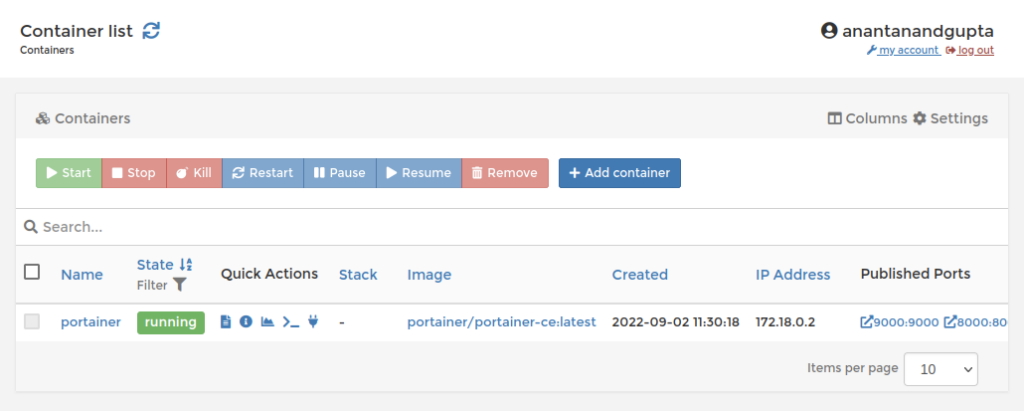
Our portainer container greets us with a smile, “hey, I live here!”. Let’s focus on some of the buttons at the top of the list of containers. some of the buttons are context based buttons, so they are a disabled at this moment. but as soon as we select a container, the will get enabled. I could have asked you at this point to select the portainer container to see the buttons getting enabled, but since this is container for portainer and you are inside portainer application itself, you can manger this container from this screen. Don’t worry, we will soon have a new container to play around.
Let’s create a new container from an NGINX image. To do so, click on the button labeled as Add container for the row of buttons are the top. You will be presented with a huge screen with many options here. I will split this screen in 2 screenshots.
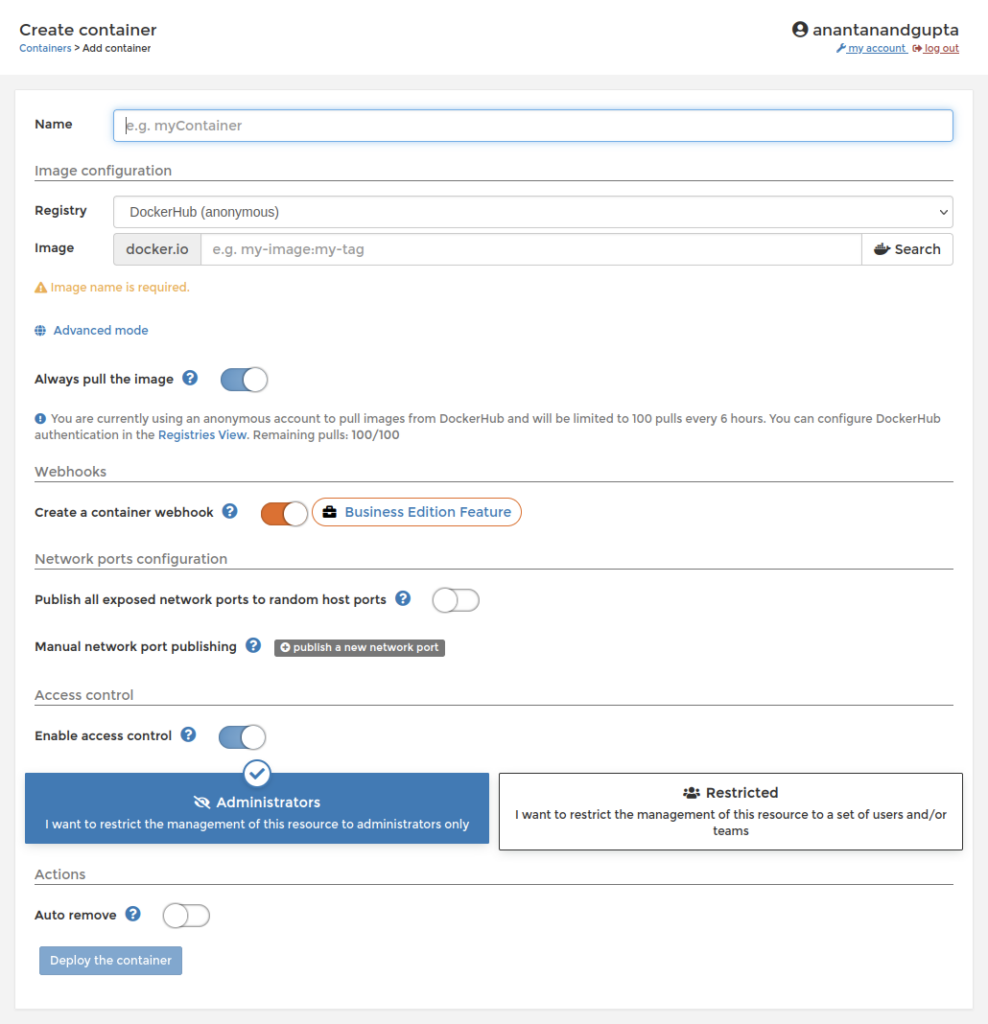
In this section I simply provide name, image and ports to be bound to host if there are any. In our example to host a simple nginx container, we will be using all three of them. Let’s enter the values as list below.
Name: nginx-container
Image: nginx:latest
for mapping / publishing the ports from container to host, we will need to click on the little gray button labeled as “publish a new network port”. This will show a tiny form, where we can specify the host and container ports.

I have entered the values as 8080 and 80 for host and container respectively. Now it is time to jump to the next part of the screen.
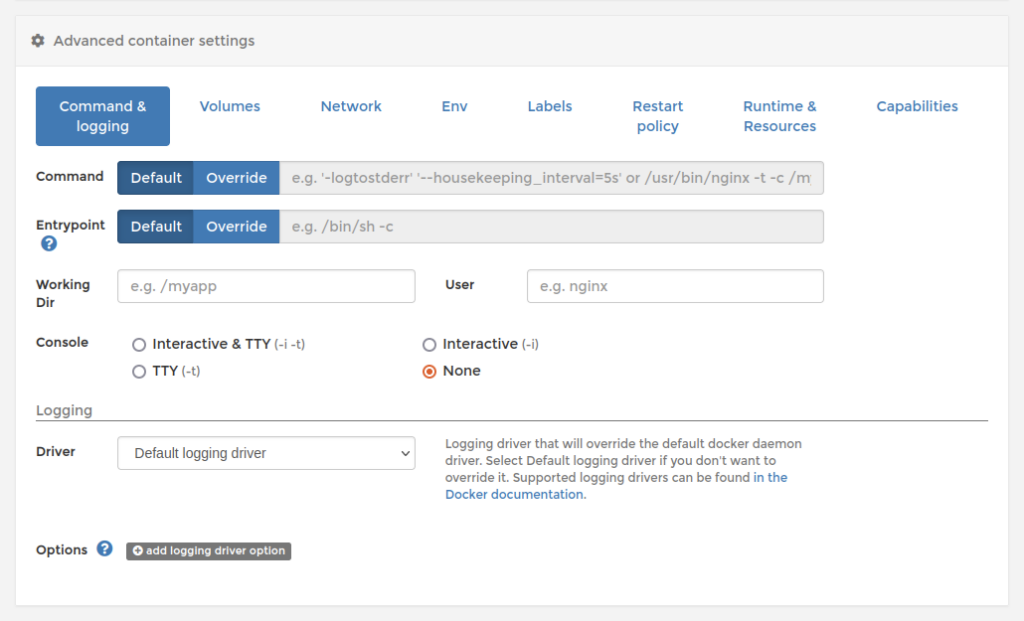
In this section we can provide the advance parameters (as decided by portainer team that these are advance parameters). We will be jumping to the Networks tag here.

from the network dropdown, I am going to select the network which we created which is “learn-docker”, in the host name we can enter “nginx-container” (the name of the container). That’s I am going to touch in the part of the page for the sake of scope of this post. At the bottom of the previous part of the screen you will see a button labeled as Deploy the container, just click that and see the magic. Docker at this point downloading the image (as it was not existing in the local environment) and run the container with the provided options and configurations. The newly created container is now visible in the list of containers.

Let’s quickly test the container by opening a new browser tab and navigating to http://localhost:8080. This should show the nginx welcome screen as shown in the screenshot below.

We can close this tab it looks all good and back to portainer. You remember that we talked about the row of buttons in the beginning of this section. Let’s briefly talk about them. Select nginx container from the list by clicking on the checkbox in front of that item. You will see some of the buttons getting enabled.

At this point we can see below buttons enabled
Stop – Gracefully stop the container
Kill – Hard stop the container
Restart – Gracefully stop the container and start it again
Pause – Pause the container while keeping in memory values and processes
Remove – Force remove the container (since this container is running)
Let’s stop the container and see what happens to the buttons now.
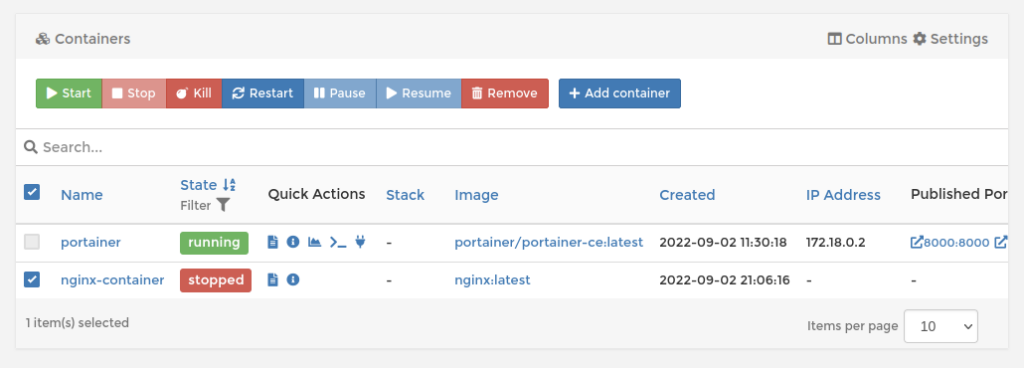
We can see that the Start button is now enabled and few other buttons are now disabled. So the buttons are enabled / disabled based on the context. That all for this section.
Conclusion
With the end of above section I will conclude this post too. Hope you have enjoyed this post and have learned something new here. I will be writing more on the related topics in extended details in my future posts. That’s all for today. See you soon again.
Thanks for reading!