
It is the default behavior of the web browsers, when you click on the image link, to open the image and display it over there. There are instances when you might want your users to remain on the page and simply download and save the image after clicking on the image link.
This functionality can be achieved in ASP.Net. Here I am going to show how to:
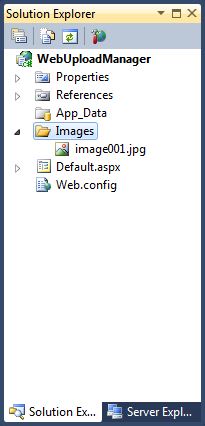
Create a blank ASP.Net Web Application. Now you have to create a folder to store the image to be downloaded and add and image to it.
Your solution should look similar to this:
Open the Default.aspx and create a HyperLink to the image like this:
<asp:HyperLink ID="hlDownloadImage" runat="server" NavigateUrl="~/Images/image001.jpg?Action=Download">Download Image</asp:HyperLink>
Note that the image URL is having additional parameter “Action” with value “Download”. We will see the utilization of the same in a moment.
now go and add a new file of Type ASP.Net Module ImageDownload.cs to the solution and modify the code as below:
public class ImageDownload : IHttpModule
{
    #region IHttpModule Members
    public void Dispose() { }

    public void Init(HttpApplication context)
    {
        context.BeginRequest += new EventHandler(context_BeginRequest);
    }
    #endregion

    public void context_BeginRequest(object sender, EventArgs e)
    {
        HttpApplication app = (HttpApplication)sender;
        HttpRequest req = app.Request;
        HttpResponse res = app.Response;
        if (req.Params["Action"] != null && req.Params["Action"].ToString() == "Download")
        {
            string path = req.AppRelativeCurrentExecutionFilePath;
            res.ContentType = "image/jpeg";
            res.AppendHeader("Content-Disposition", "attachment; filename=" + Path.GetFileName(path));
            res.TransmitFile(app.Server.MapPath(path));
            res.End();
        }
    }
}
Modify the web.config file to include following in <httpModules> section:
<add name="ImageDownload" type="WebUploadManager.ImageDownload"/>
You are done. Run the application and click on the Link for the image and you will see the Run/Save dialog. Try removing the Action parameter from the NavigationURL of the hyperlink; image will be displayed on screen as the default behavior of the browser.