It has been a long wait for the worlds most popular private messaging app to be free of the bounds of requiring a device with SIM Card with an active mobile number linked to the account. Before this Facebook (Meta) launched a web based version which can be linked to the mobile devices using the linked device feature, where you were able to scan QR code to link the web version of the application and use it for messaging. This was my go to for a few years for the web and then the desktop version of the application.
This feature was not seemless for the android tablets. We were able to use the web based WhatsApp (https://web.whatsapp.com) on android tablets, but it was not always working. You may or may not able to load the application at some times.
Last couple of months, whatsapp has started rolling out the Beta version of the WhatsApp application for Android users in a limited capacity. If you are lucky enough, you will be able to join there beta program to download the beta version on your android tablet.
beta program is almost always full
I am a beta user of WhatsApp from almost 8 or 9 years now. and thats where I was able to get the beta version of the application on my Samsung Tab S8 Plus. Meta is rolling out the beta version of the application also to limited users, that means even you have the beta program joined, you still may not be able to get the latest beta version supporting the SIM less operations on your Android Tablet. In case you are still looking for the tablet version of the application then you can use the sites like APKMirror to search and download the latest beta version of the application.
Either way, once you have the application installed, you will get a very similar experiance as that of WhatsApp for Web or WhatsApp to macOS or Windows Desktop. If your Android table is not having the SIM Card capabiltiies, then you will be presented with a QR code to link the application with your existing account on your mobile phone. Just open the settings of WhatsApp on your mobile and select linked devices to add new linked device. WhatsApp on your tablet will be acgtivated and linked to your existing account. Remember that this functionality still is dependent on the communication between the actual account holding device and the linked device. You are required to keep the main account holding device online for this to function. If your device is out of juice or network, then you will not able to use this on your tablet either.
I wish there was a option to have this service work without the connection with the primary device. The main reason which I believe is the end to end encryption for the communication between 2 people. A chat is encrypted by a unique encryption key between 2 parties and that is some how not sharable between multiple devices by the current design of the application framework. but if Meta makes there mind to do it, it should be posible in near future.
I am enjoying the application today, if you are able to get the version, please share your experience with us in the comments. Happy messaging!!
My experiance with ACT Fibernet started almost a decade ago when I moved from then newly launced Relaince provided wireless Internet Services (which was assumed by me as the worst experiance of that time). ACT was able to bring a relief as they were able to quickly bring the internet to my doorsteps. …BUT
Soon I realized that thier infrastructure in Bangalore was very new and the distribution design was not efficiant. They were reliant on the local node setup on the rooftops of your neighbours. A detailed review at that time was posted by me on this site itself that time too. Though the nodes were battery backed up, but the power cuts where draining the batteries very fast. The whole echo system gose down with that. After continous / multiple complaints, they started improving. Over the years I will say that I have been a satisfied customer of this service. So satisfied that I have been refering my friends to prefer ACT over other service providers. Then this happened …
I moved from the locality where I was staying to a new area where the service was not so good. I remember telling my friends to go for ACT in this area and they always said no, and others in this Area is not having any good experiance with ACT, which always surprised me as I was happy. This all happiness all of sudden disapeared as soon as I realized myself that the service is actually bad in the area.
I have repetedly complained about poor internet speed, frequently getting disconnection and not being able to access all the sites / application most of the time. And My surprise the solution was alway received by a ticket getting closed without resolution.
Since I need to work, and need a internet connection all the time, i had to opt for a second service provider (Airtel) this time. To My surprise the service and customer service of Airtel is much prompt and stable. Since there is no other good service provider (except that shitty reliance service named Jio who has the only moto of sucking money) I had to keep both the connection for the sake of redundancy and backup.
ACT never improved, and Airtel started getting some connectivity issues too. which made me look back to ACT. I started using the same as my daily driver. But truly speaking it is a nightmare. Nothing works Netflix, Hotstar, Prime TV etc. many services and applications don’t work many sites are not accessible and you wont believe that search pages like Google and Bing wont work many times.
I open a ticket and the service team will suggest to restart the router or wait for some time so that the connection will be restored automagically, without them doing anything. The customer support is no more existing. Nodal officers are not responding or taking pain for the customer complaints. From last 2 months I have been following the tickets open and close game. I open a ticket they close the ticket.
Here are a few resolutions they provide and close the ticket:
don’t use Google DNS or any other Third-party services
your internal network should be as simple as router to laptop as lan connection, anything else is BS and is not supported.
if you are using anything which is not connected by LAN, will not get speed or may get issues in connection dropping or site not reachable etc. (this all in the world of wifi)
I have a internet WAN load balancer setup just to keep high availaibilty in place, and the so called engineers of ACT are not aware of that how this works, they simply say the other provider is creating issues in their internet … lol.
You have to use the service on their router only.
it is your fault and no investigation is needed at the ACT side.
so basically totally crap.
I am sure many out of your have faced the issues with ACT Fibernet and many of you might have been happy customers of ACT, but it seems that we realise the truth only when we face problem. If the internet is working flawlessly then you never know the kind of support you are going to recieve at the end.
I wish ACT Fibernet improve their services and customer support over time.
and for you all reader of this honst and short grudgeful review please share your experiance with your serice provider in the comments. Thanks!
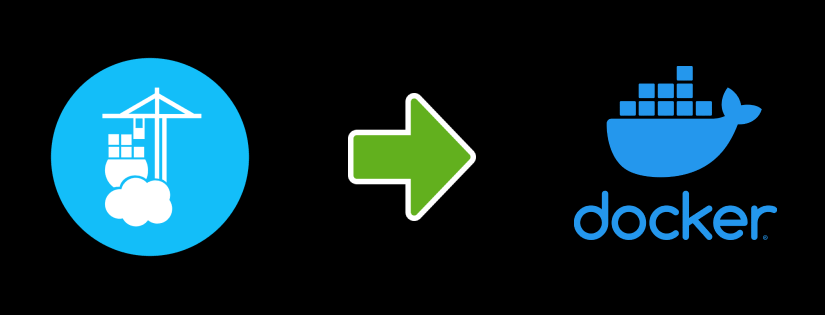
When it comes to managing docker on remote machines (or even on you daily machine), it it sometimes feels tiresome to remember all the docker commands and use them on day to day bases. Tools like portainer brings a life to the our daily activities which involves management of docker and containers and images and repositories. The focus of this post will not be the advance learning of Portainer, but sort of its setup and introduction of portainer basic capabilities.
Installation
If you go to official site you will see many ways a portainer can be installed. Since we are using the setup we have created in my previous post, we will use the standalone installation as Install Portainer with Docker on Linux. You will see the command listed over there to install the portainer as a docker container with in docker. That’s great … right? But wait, what we will do before that is create a volume and a network MANUALLY (I know we need portainer to get rid of all this hassle, but believe me there will all hassle free once our manual initial setup is complete). Just follow my lead and you will see that easy life.
So lets create a network by executing the below command.
$ docker network create learn-docker
this network will now have the ip range, from which we can choose an IP to be assigned to our container. While running the container, if we don’t specify the Network and IP address, then docker will use the default bridge network and next available IP address from the range in that network. Let’s figure out what IP range.
Notice the Subnet and Gateway properties in the output above. By this configuration any container joining in that network will get an IP from range 172.18.0.2 and 172.18.255.255.
Let’s move ahead and add a new volume for portainer by executing the following command.
$ docker volume create portainer_data
Now we are ready to install portainer. Execute the below command to install portainer.
By this time if you have started following the official documentation, you will notice that there they are using / exposing port 9443 in place of 9000. Please don’t bother that, as in future we will not expose that port from portainer anymore.
If the command was successful, you will see a nice long ID like string in console. Lets see the status of the portainer container by running following command.
$ docker ps
If the portainer is successfully installed and running, you will see that entry in the output there.
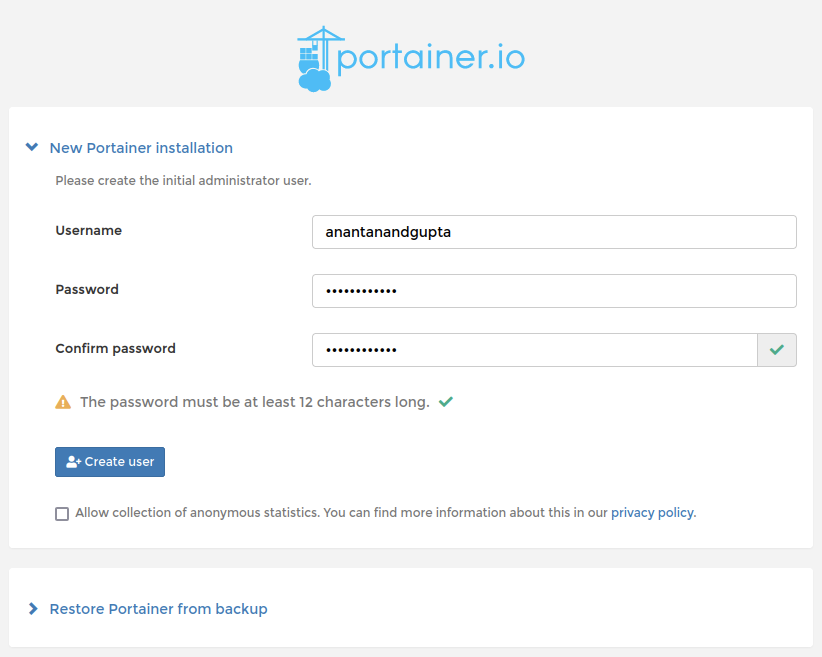
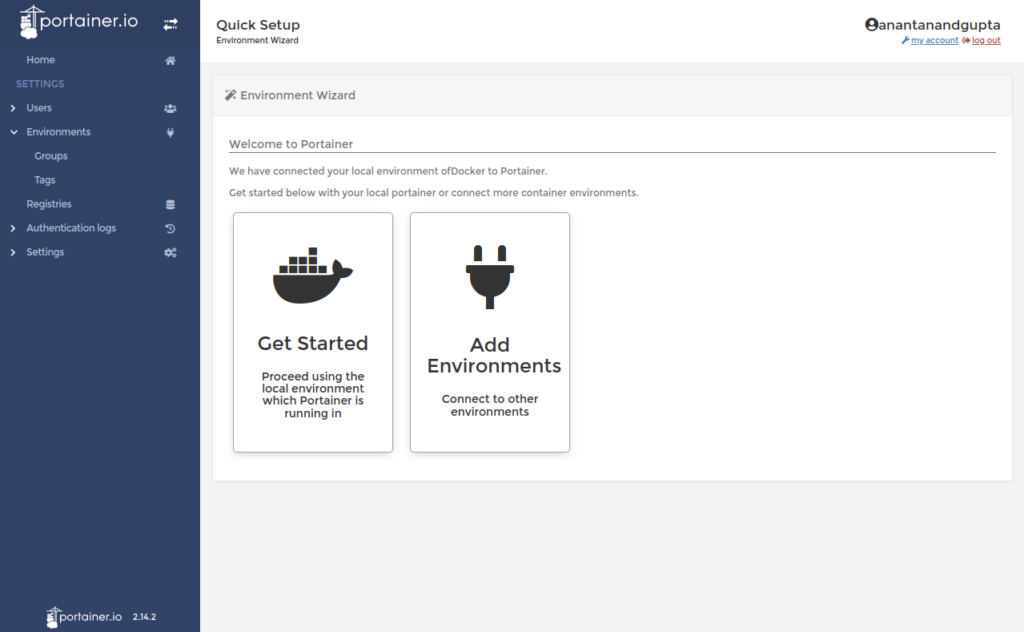
Open a browser window and navigate to http://localhost:9000. You should see screen to create your first admin user like below. Create your credentials and remember them / save them for the future use.
New Portainer Installation
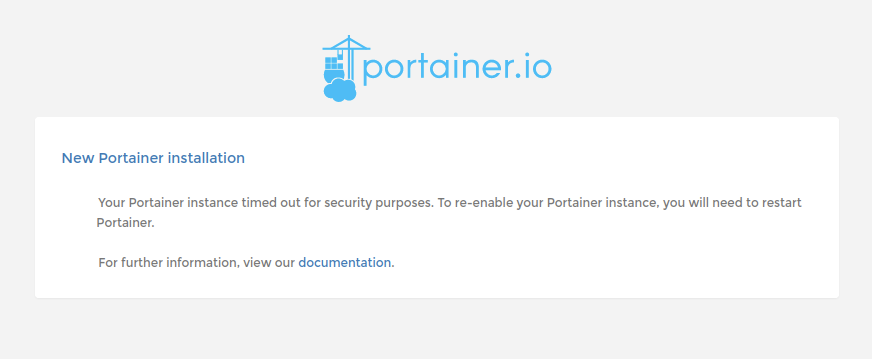
In case you see the screen something like below, just restart your portainer container by issuing the below command and refresh the page.
portainer installation timed out
$ docker container restart portainer
On successful admin user creation you will be presented with a screen similar to below, from where we start our next section of configuration.
Ubuntu is a versatile Operating System and when I started using it, I started needing it everywhere. I had windows in past and now I have Intel based macbook, but I always had a VM with Ubuntu. There are many things I would like to still do in Ubuntu, like setting up servers and clusters. Today when we talk about the docker setup, we will be talking about the same Ubuntu. For this post I will be using the Ubuntu VM setup in a VM hosted by VMWare Fusion. I will be using the current LTS version (22.04) of Ubuntu Desktop (this makes it possible to capture few screenshots for this post).
Prerequisite: VM Setup
In case you are interested in knowing how to setup a VM in fusion, you can search youtube (I will put some tutorial links here from my content as and when they are ready). For now you can read / watch my old post / video here, which is based on the Microsoft Windows edition of VMWare Workstation. In case you have a server host linke GCP, Azure, AWS or Linode you can create a VM there too, the choice is yours. The only thing you have to remember that if you are opting for the VM route, you will need to enable virtualization in the VM setting.
About Docker
If you guy are here then I am sure that you have a very basic idea about docker or have seen or heard someone talking about this. I am sure you are are amazed with their talks and are definitely interested in learning more about that. I am not going to touch in detail about docker in this post, but promise you that I will be posting more about Docker in future. For know, just understand in plan English that docker is a software which has the capability of running your applications in an isolation from the rest of the system (know as containers). It seems and behaves like tiny vm only but it is sharing the underlying infrastructure. In simple words it doesn’t virtualize the hardware at all.
Linux and Docker
These 2 systems walks hand in hand. Take Ubuntu (Linux) as host to run Docker to run containers which are based on linux based (though there are images of other OS too), images. I am sure there will be people coming back at me on the above statement, but believe me that the most beautiful marriage in the world ever. In case of server environments there are 2 major players (as host for docker), Windows and Linux. We will also be using this docker setup in future posts to set up various things and learn more. So, let’s get started.
Setup
By this point I am sure you already have an Ubuntu machine running somewhere (VM, Laptop, Cloud / Datacenter) and have been patiently waiting on the text above. So I will not waste anymore time of yours.
First thing First – Update
As a ubuntu user, I always prefer to run apt update before any software installation, which impacts the system. So open the terminal (press ctrl + alt + t)
$ sudo apt update
Start Setup
Now before we proceed, I need to tell you that I will be setting up a Docker Desktop edition, which comes with some ui to interact with (and take a few screenshots for this post). There is another variant which is generally used on the servers and have no UI (portainer a nice tool to know in case of docker setup on headless servers).
To get the docker desktop headover to the docker official website here. You will see the instructions over there and try to follow them here. In the beginning there are some instructions to remove the older version of docker engine in case you already have the installed (as innocent mistake while trying to figure out the length and breadth of docker by following some older posts / videos). You can skip those steps as in our case we have a fresh installation of the operating system (I am assuming). Since we have already updated the system we can directly run the below command in your terminal.
The above command will install some the required packages (don’t worry, in case you know that some these packages are already installed on your system). No create a foder for the keyrings as follows (again don’t worry in case you already have the folder on your machine).
$ sudo mkdir -p /etc/apt/keyrings
now get the GPG in that folder by executing the below command.
You are ready at this point to download and install Docker Desktop. But since we did some system changes like adding a new repository, we are required to run the apt update again. Remember that it may all fail if the above step is ignored or missed.
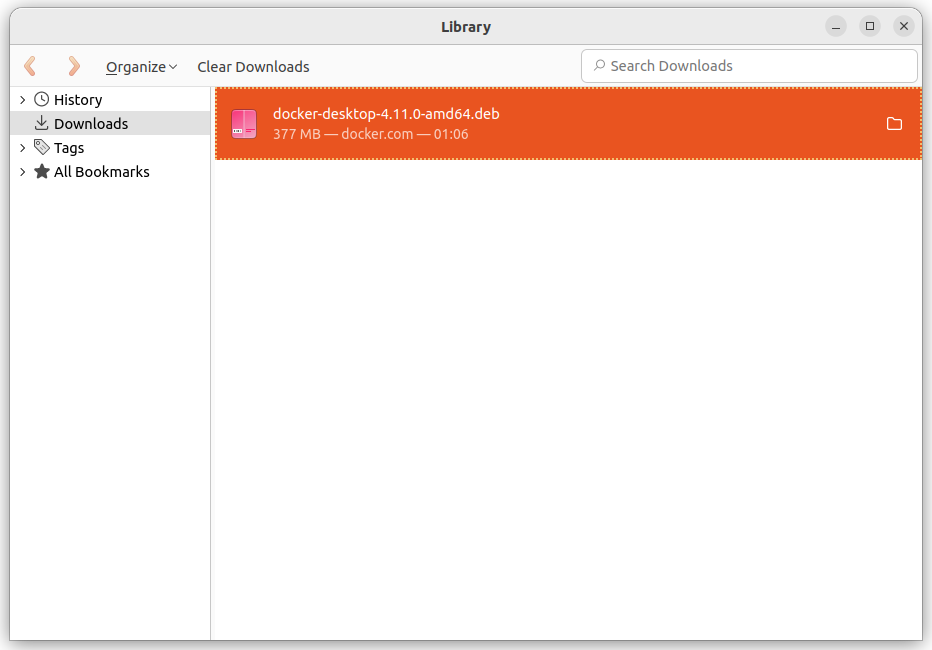
Jump over to this link and download the DEB package by clicking the link provided on the page. I am not intentionally pasting this direct down link here is because, future readers may not find anything here, since the external site has updated the link. Once downloaded you will see the .deb package in the folder where you downloaded the file (default is Downloads folder).
Downloads in Firefox Libraryfiles in the Downloads folder
Open that folder in terminal and execute the following command.
Above command will take a few seconds to setup the docker desktop. You have successfully installed the Docker Desktop now. Before you run the application go ahead and restart the machine. Once the machine is restarted navigate to terminal and execute the following command.
$ systemctl --user start docker-desktop
Or you can find the docker Desktop application in your applications list, just click to open the same.
Docker Desktop Service Agreement Screen
That’s all folks, you have docker desktop running happily on your ubuntu machine. In case you have any questions, please don’t hesitate to put them in the comments. I will be happy to answer them all as soon as possible.
When I started this blog, like 13-14 years back, I was not thinking that I will not be regular here. But, time has its own way. I have been busy in doing things and of course learning the life too. I have left many things behind now.
The focus which I am trying to build now is
improve health
learn and share the new tech and knowledge
build a new career and future
In past 5 years, I have kept myself super busy and with a dream which I thought was worth, but now it seems that I have been holding the wrong hands. Never mind no time is wrong time, if you come out of that with a lesson learnt.
The Future
I have a few product ideas in mind and have started evaluating the same. I will share with you what’s in my mind very soon. Also, I have decided to go fully into freelance consulting in the technologies like NodeJS, Angular, Firebase, Cyclos, React-Native, .Net (C#) etc.
I have been with fintech and payments domain for quite sometimes and have implemented large enterprise scale solutions and build many products in fiat and crypto domain. I think now I am ready to fly to heights higher than the clouds.
I hope I will be able to bring new things for you all and contribute towards the community along with what I am trying to achieve.