AngularJS with ASP.Net MVC (Part 3)

A step by step tutorial on how to use AngularJS with ASP.Net MVC

Precap

I have started this as a multi-post tutorial, where in the previous part we have created a minimal project in Visual Studio 2015 using Web Applications Empty template with MVC folders and references. The application is running now and show Hello World!. You can read that post part 1 and part 2 in case you have not gone through that already.

I don’t want it like that …

The default template includes Bootstrap, jQuery and Modernizr as NuGet packages to the the project as soon as I added the view to it. I made it clear earlier … i don’t want it like that. I want my own or you can say different way to include these libraries. So, lets cleanup and add it differently.

Get rid of them

Open NuGet package Manager and remove bootstrap, jQuery and modernizer from the project (Select package and click Uninstall from the right side panel).

P1789_001

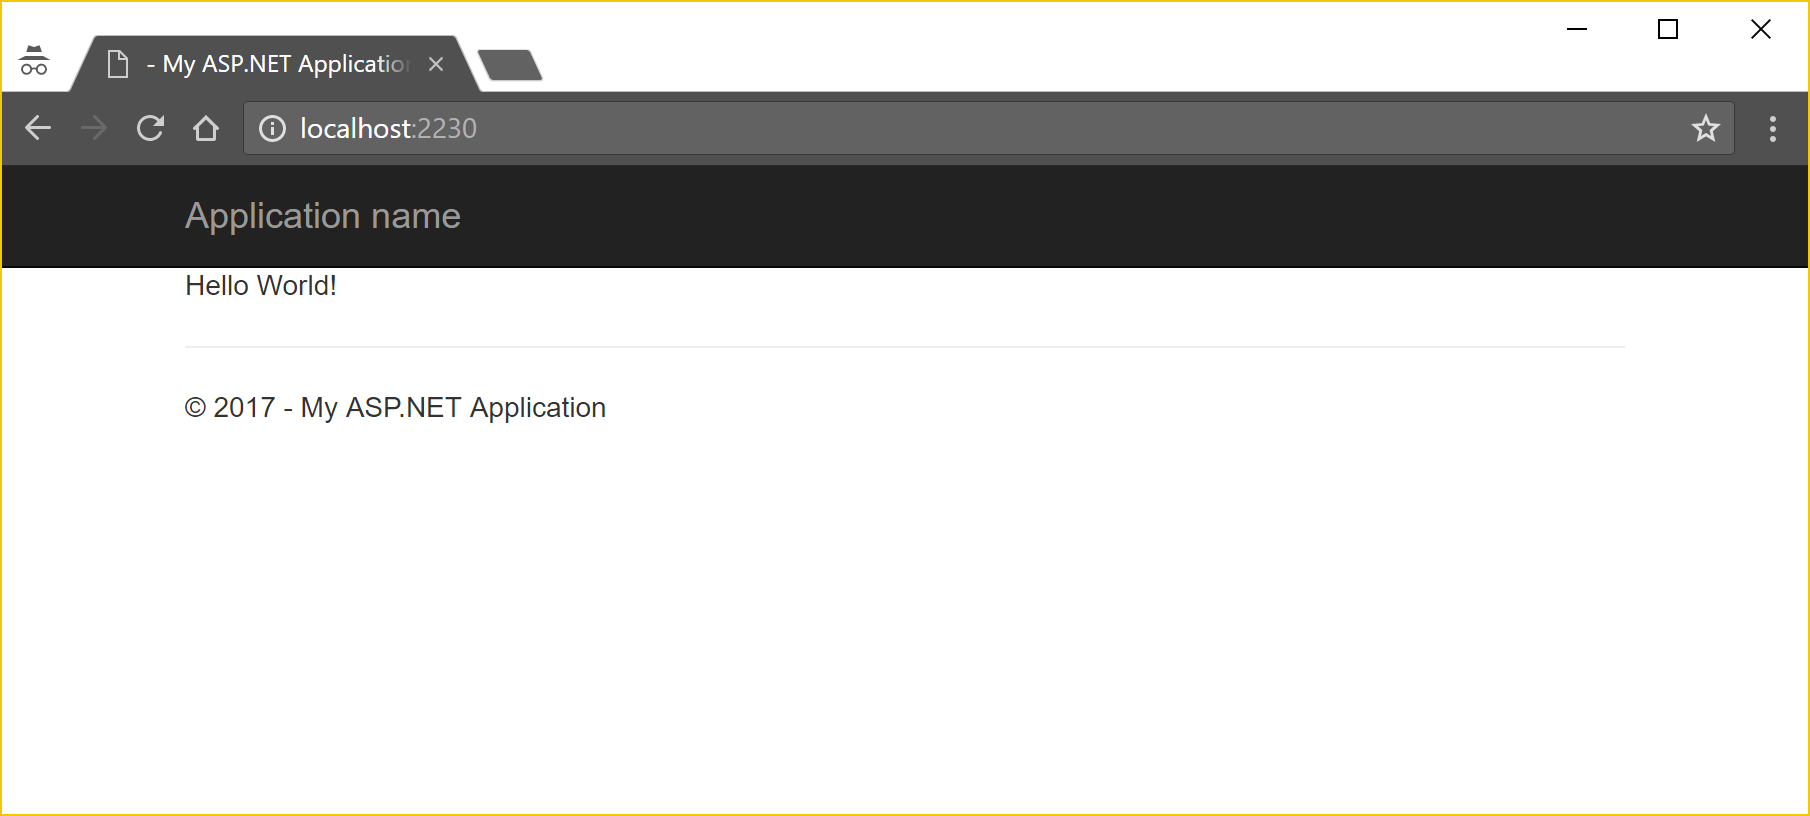
Open _Layout.cshtml and replace the content with the code below. Run the application and see the neat and tidy white page with your Message you entered during the previous post (Hello World! for me).

<!DOCTYPE html>
<html>
<head>
    <meta charset="utf-8" />
    <meta name="viewport" content="width=device-width, initial-scale=1.0">
</head>
<body>
    @RenderBody()
</body>
</html>

Using Bower

It’s not like that we don’t need jQuery or bootstrap, but we will be using bower to install them. If you are not aware of bower and how to install it, Just follow this guide on installing bower. once you have bower installed, create a file in your project name bower.json with the below contents.

{
     "name": "AngularJSwithMVC",
     "dependencies": {
     }
}

Now open the command prompt and change your directory to the project folder. Here you have to enter a few commands to add the required libraries.

bower install jquery angular ui-router bootstrap --save

bower creates a new folder named bower_components project root, which you should now include in project using solution explorer. Here is your bower.json after that command if all went well.

{
    "name": "AngularJSwithMVC",
    "dependencies": {
        "jquery": "^3.1.1",
        "angular": "^1.6.1",
        "angular-ui-router": "ui-router#^0.4.2",
        "bootstrap": "^3.3.7"
    }
}

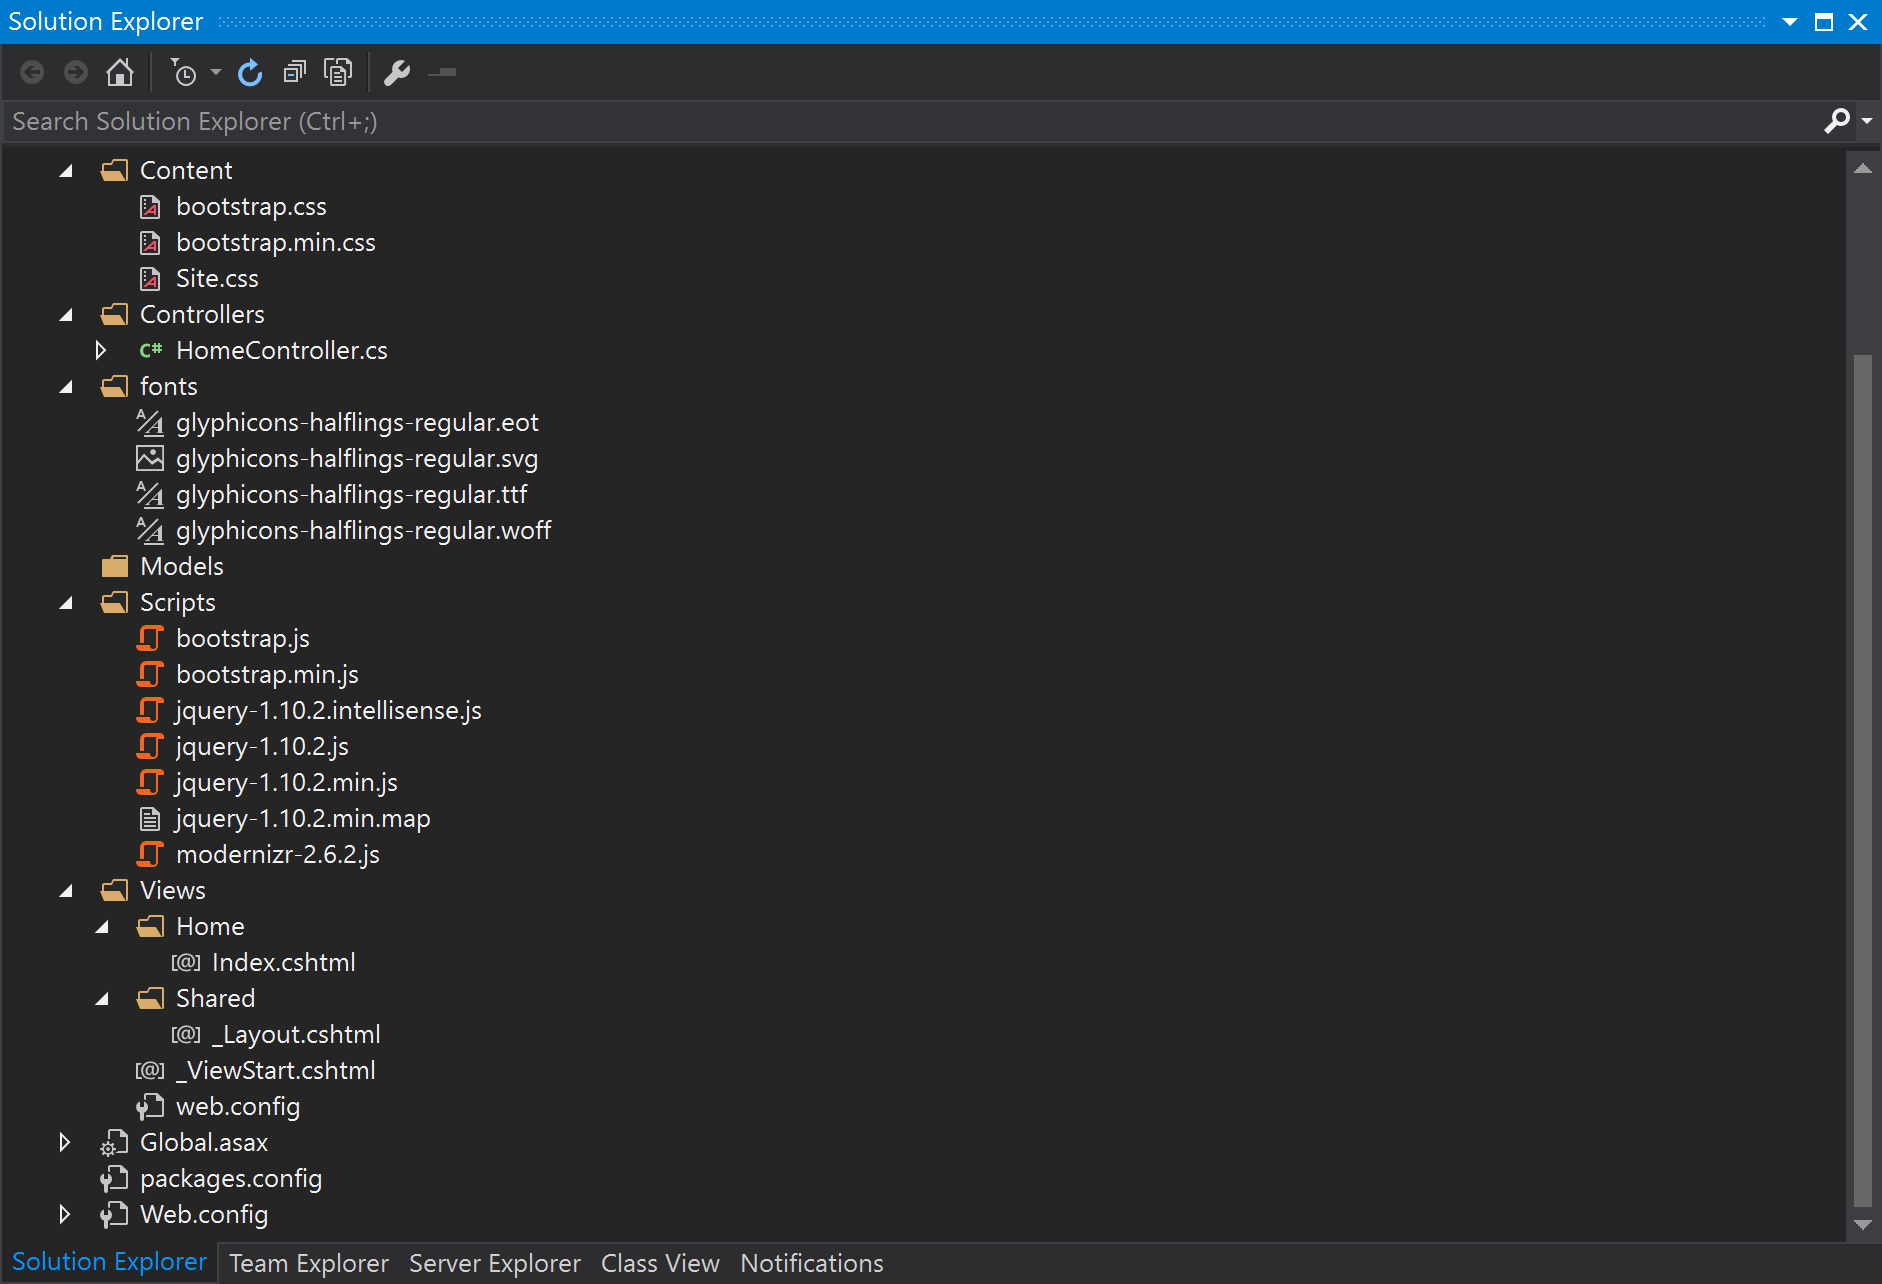
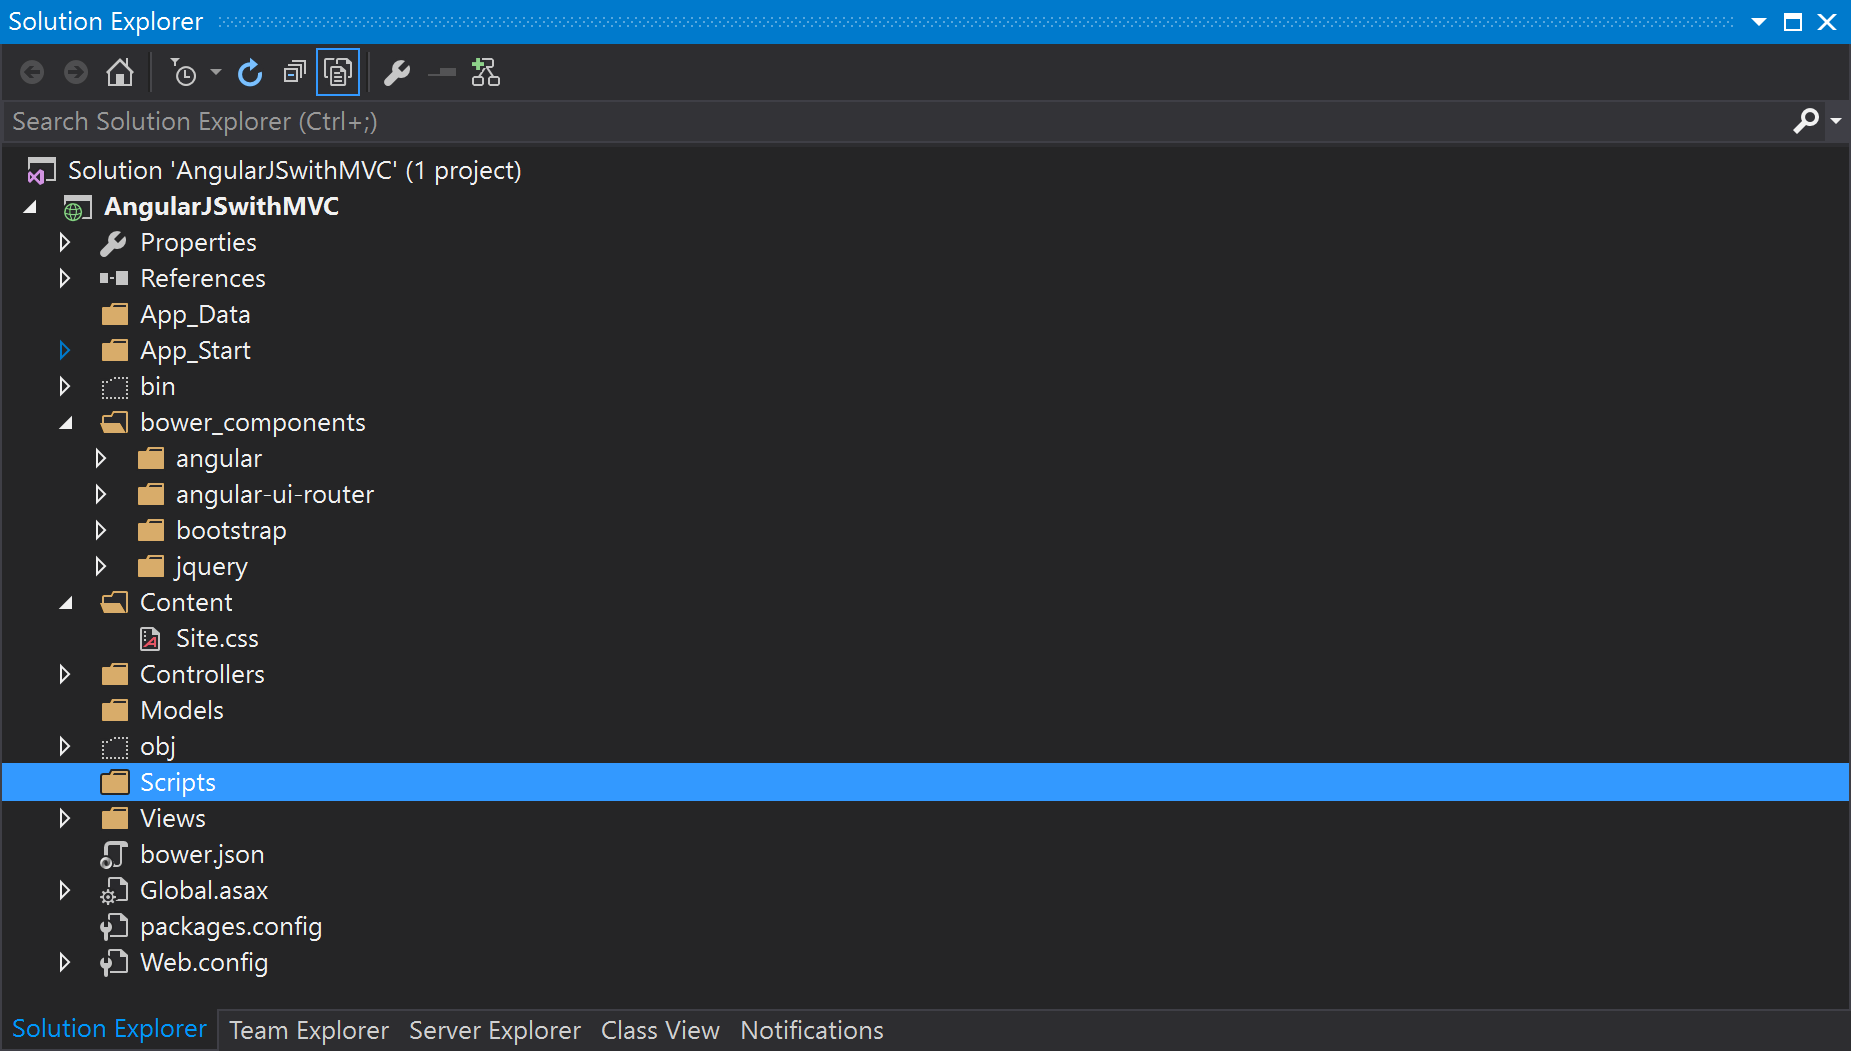
This is the result …

Your solution / project should look something like this at the end of above steps.

P1789_002

I am not saying that using NuGet is bad but there are many other package managers out there, where bower and npm are the widely used with the latest versions continuously updated. That’s the reason we have used bower to install those libraries. Let me know which package manager you are using or want to use.

P.S. might have used npm itself in place of bower, but I am more comfortable with bower.

Please leave your comments below in case you have any questions till now on this. Your feedback is very much important to me and all the other fellow readers. I will continue on the next post where you will be able to see how to minimize the scripts and style files and include them in your webpage template.

Series Links

Part 1 Part 2 Part 4 Part 5 Part 6 Part 7 Part 8 Part 9 Part 10 Part 11

AngularJS with ASP.Net MVC (Part 2)

A step by step tutorial on how to use AngularJS with ASP.Net MVC

Precap

I have started this as a multi-post tutorial, where in the previous part we have created a minimal project in Visual Studio 2015 using Web Applications Empty template with MVC folders and references. You can read that post here in case you have not gone through that already.

Making the First Impression

In the project till now we have a application which can build and run but there is no content to be shown to the user. If you run the application at this stage, you will end up seeing an error page. It is now time for us to make this application truly running and showing something.

Add a View and Controller

As a MVC application we should now add a View and Controller to the application as a Default Controller and View. To do that, right click on the controllers folder and select Add -> Controller …, where you will be presented with a window similar to one shown below in the image.

P1686_001

We are going to select MVC 5 Controller – Empty from the list and Click Add, which will ask us to name the controller class. I am going to name it HomeController.cs. Here is the default code from the the empty controller template. This file should be present in Controllers folder of the project.

using System;
using System.Collections.Generic;
using System.Linq;
using System.Web;
using System.Web.Mvc;

namespace AngularJSwithMVC.Controllers
{
    public class HomeController : Controller
    {
        // GET: Home
        public ActionResult Index()
        {
            return View();
        }
    }
}

Now right click on the only method named Index() and select Add View from the Options Menu. The window which opens on this action is similar to the one as show in the image below. Please select all the options as it is showing in the image and Click Add.

P1686_002

At this point a few new files and references are added to your project, you can see that in the image below (don’t worry we are going to remove many of them soon). The only important files for for us where we have to focus are Views -> Home -> Index.cshtml and Views -> Shared -> _Layout.cshtml

P1686_003

Say Hello to World …

You have to open the Index.cshtml and Enter any text you wish, for me, it’s the 2 worlds of love every programmer knows “Hello World!”. Once you are done you can hit your favorite function key (F5) to run the project and see the output. Yups … you have your first page displayed in the default browser (Sorry! Google Chrome) something like this and your message surrounded by the clutter of default template something like this.

P1686_004

Before you start thinking …

What the hack! … why all this efforts and it took 2 posts for you to reach to this point. Man! you might have selected a MVC template in place of Empty one to begin with, but wait, before you get that idea, answer the simple question … Where is the fun in that?

Another point here, as I have told you in my previous post, we want a minimal project and now I am telling you that we are going to even remove the files and references which are required but will be acquired differently. Be patient and follow the lead … In the upcoming posts you will almost acquire the taste of this.

I am not saying that its all good till here but, remember that, there is a comment box below here, where you can argue whatever your ideas are.

Your feedback is much appreciated and will try to correct and improvise as much as possible. I will post the links for the next post in this series here as soon as they become available.

Series Links

Part 1 Part 3 Part 4 Part 5 Part 6 Part 7 Part 8 Part 9 Part 10 Part 11