A step by step tutorial on how to use AngularJS with ASP.Net MVC
Precap
We have almost built our simple AngularJS with ASP.Net MVC application during the course of a few posts. The application shows how AngularJS integrates with ASP.Net MVC and uses a few of its features. In case you have not gone through the posts, I would recommend going through them. Here is the link for the first post in the series “AngularJS with ASP.Net MVC“.
Made for Each Other
As I am telling you from the beginning that this tutorial series is not to teach AngularJS or ASP.Net MVC, but to show, how you can use these two technologies together effectively. You might have found till now that these two technologies mix up quite well and can be great if coupled together properly. There is one more area where it can be seen, if used together, they can do wonders and that is Authorization of Content.
Authorization in AngularJS
We will see during the course of this post that how we implement the Authorization in AngularJS only. We have already created an AngularJS application which has a few routes and they all are open to every one. Now let’s say that we have to protect the Page 1, which should be accessible only when there is a user signed in (we will be simulating the sign in process by putting a token in bower’s localStorage). So, let’s begin.
Create Authorization Service
We will take help of an AngularJS service, which will tell if the current user has the access to the given route or not. For the simplicity and quickly moving ahead, you can take a reference from the code snippet below.
(function () {
    'use strict';

    angular.module('app')
        .provider('authorization', function () {
            var getToken = function () {
                return localStorage.getItem('access-token');
            }
            this.$get = ['$q', function ($q) {
                var service = {};

                service.chechAuthorization = function (role) {
                    var deferred = $q.defer();

                    var token = getToken();
                    // TODO: logic to see if the token has
                    // the permission required for the given role.
                    // here should be logic to extract the claims
                    // from token and get the roles from it
                    // we are simply checking as of now, if the token exists
                    if (token) {
                        deferred.resolve();
                    }
                    else {
                        alert("You are not authorized to view this section.")
                        deferred.reject();
                    }

                    return deferred.promise;
                };

                return service;
            }];
        });
})();
This code has been created in a new file named app.authorization.provider.js under folder Scripts -> app ->providers. This service has a single method having the logic to check if the given role is part of the topic. The token is read from browser’s localStorage. The logic here is not the main point of discussion, but to simply demonstrate the use of service to detect the authorizations. You are master of your rules and logic, and I am sure you will be perfectly fine, writing a better and secured logic here. So, let’s move ahead and use this service.
Note: Remember to include the newly created file in the BundleConfig.cs.
Securing AngularJS Route
In the previous step we have created a service which will tell us if the given role is present in the claims received in token. Now we have to modify the route configuration for the state named “page1”. Here is the code after modification of file named app.route.js (notice the highlighted code)
(function () {
    'use strict';

    angular.module('app')
        .config(['$stateProvider', '$urlRouterProvider', function ($stateProvider, $urlRouterProvider) {
            $urlRouterProvider.otherwise('/');
            $stateProvider
                .state('home', {
                    url: '/',
                    templateUrl: '/Home/Home'
                })
                .state('page1', {
                    url: '/Page1',
                    resolve: {
                        hasPermission: ['authorization', function (authorization) {
                            console.log('Checking permissions ...')
                            return authorization.chechAuthorization("Customer");
                        }]
                    },
                    views: {
                        '@': {
                            templateUrl: '/Home/Page1'
                        },
                        'left@page1': {
                            templateUrl: 'Home/Page1Left'
                        },
                        'right@page1': {
                            templateUrl: 'Home/Page1Right'
                        }
                    }
                })
                .state('page3', {
                    url: '/Page3',
                    templateUrl: '/Home/Page3'
                });
        }]);
})();
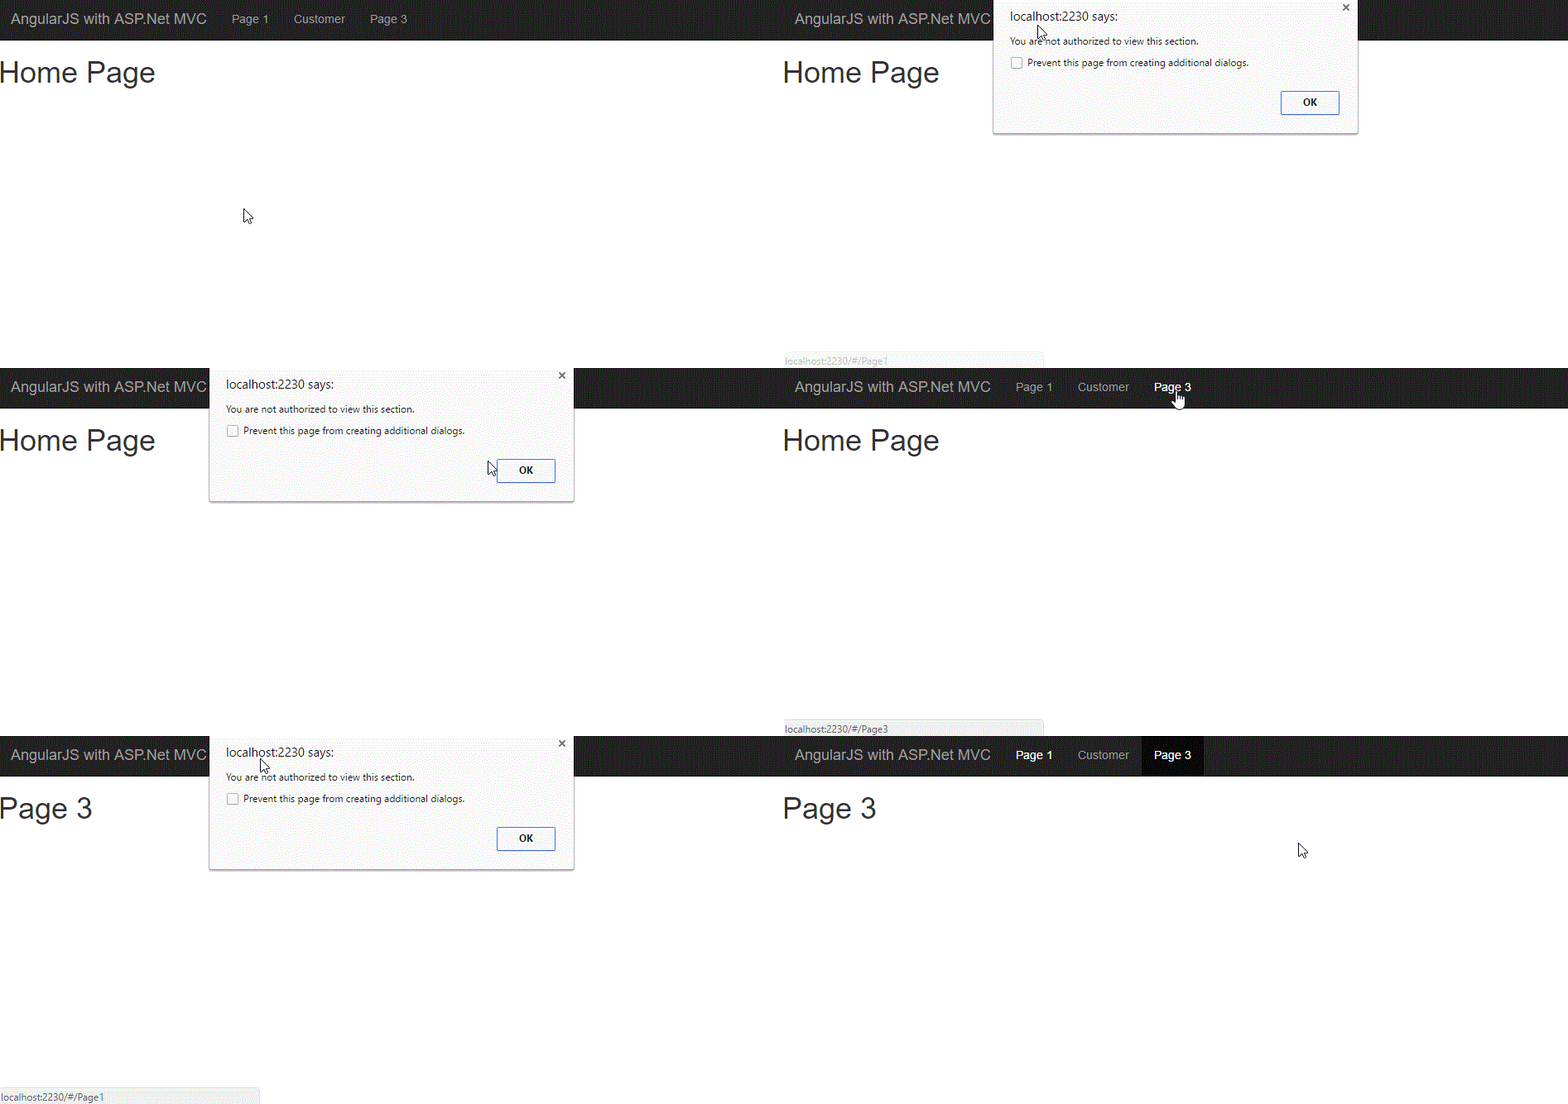
Once you are done with above modification, build and run your application. Try to navigate to Page 1. You will see a message and it will not navigate to Page 1. Here is how it is behaving now.
Getting a Token
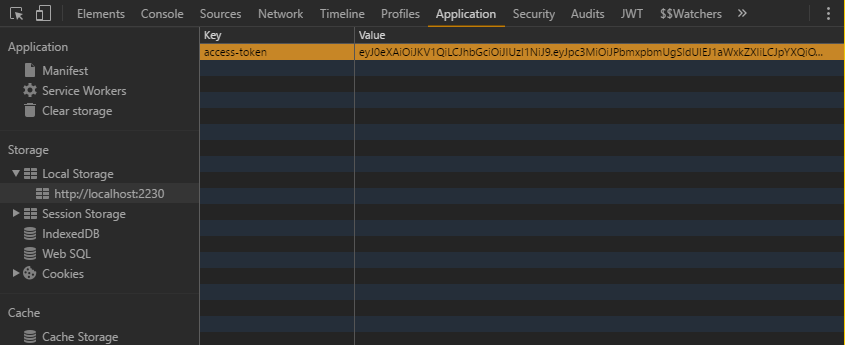
We will use a JSON Web Token (JWT) and store it in local storage at client side. There are many online sites, which can generate a JWT for you, where you provide the list of required and additional claims and select a duration for which they should be valid. I have used one of such site (Googled and picked the first result). The main thing to be noted here is the claim(s) we need for this post. I have added a Role claim with a value Customer. Once you have generated the token, open your browser’s developer tools and save the token with a key named “access-token”. Remember to do this while you are running your simple application, so that this token is available to your site. Here is how I have done is for chrome browser.
Now try to access the Page 2, you should be able to do it.
Can it be Improved?
Wow, that’s great. We have an application which can now react to the tokens received by the authentication process. But, it is at the client side and the user can manipulate the code. In the next post we will see, how we can improve this security by moving the authorization logic to server side. We will be securing the views itself, so that the user is not able to get the view if their token doesn’t contain the required role.
Hope, you are enjoying the series. As we are nearing to the end of this series, I would like you to keep a watch on this blog, because you are going to see soon a new series on topic TypeScript – Beginner Course. Please leave any comments or queries if you have any and I will try to answer them as soon as possible. I will appreciate your feedback as it will help me improve the content further.
Thanks for following … cheers!
Series Links
Part 1 Part 2 Part 3 Part 4 Part 5 Part 6 Part 7 Part 8 Part 9 Part 11


