AngularJS with ASP.Net MVC (Part 2)

A step by step tutorial on how to use AngularJS with ASP.Net MVC

Precap

I have started this as a multi-post tutorial, where in the previous part we have created a minimal project in Visual Studio 2015 using Web Applications Empty template with MVC folders and references. You can read that post here in case you have not gone through that already.

Making the First Impression

In the project till now we have a application which can build and run but there is no content to be shown to the user. If you run the application at this stage, you will end up seeing an error page. It is now time for us to make this application truly running and showing something.

Add a View and Controller

As a MVC application we should now add a View and Controller to the application as a Default Controller and View. To do that, right click on the controllers folder and select Add -> Controller …, where you will be presented with a window similar to one shown below in the image.

P1686_001

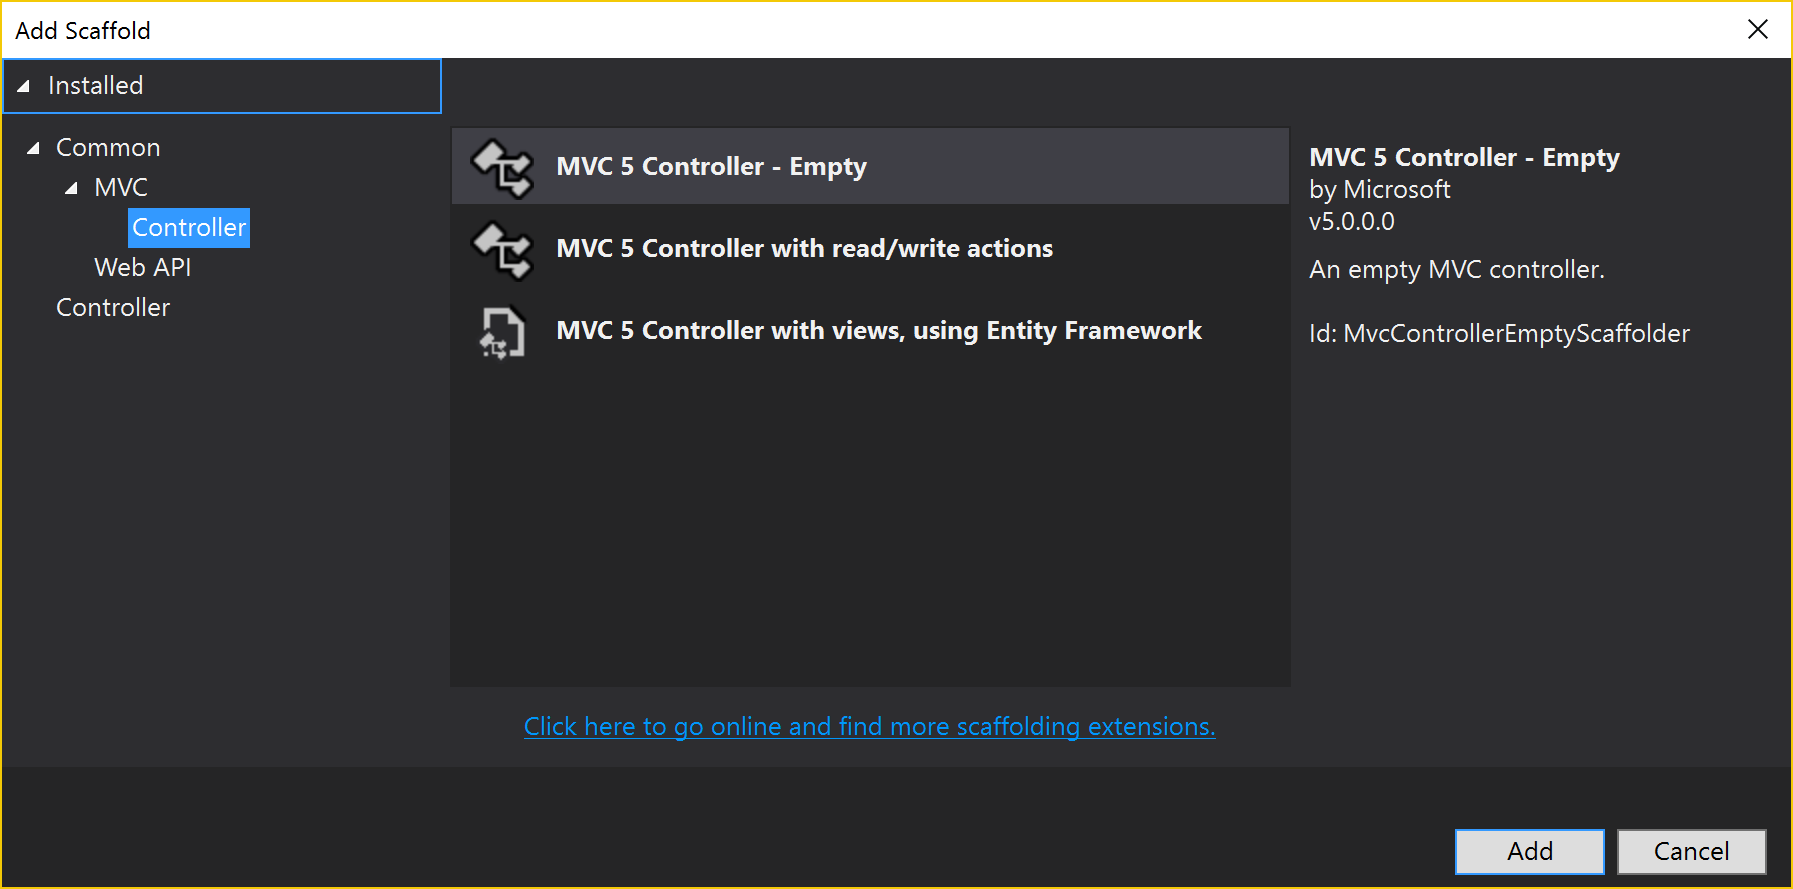
We are going to select MVC 5 Controller – Empty from the list and Click Add, which will ask us to name the controller class. I am going to name it HomeController.cs. Here is the default code from the the empty controller template. This file should be present in Controllers folder of the project.

using System;
using System.Collections.Generic;
using System.Linq;
using System.Web;
using System.Web.Mvc;

namespace AngularJSwithMVC.Controllers
{
    public class HomeController : Controller
    {
        // GET: Home
        public ActionResult Index()
        {
            return View();
        }
    }
}

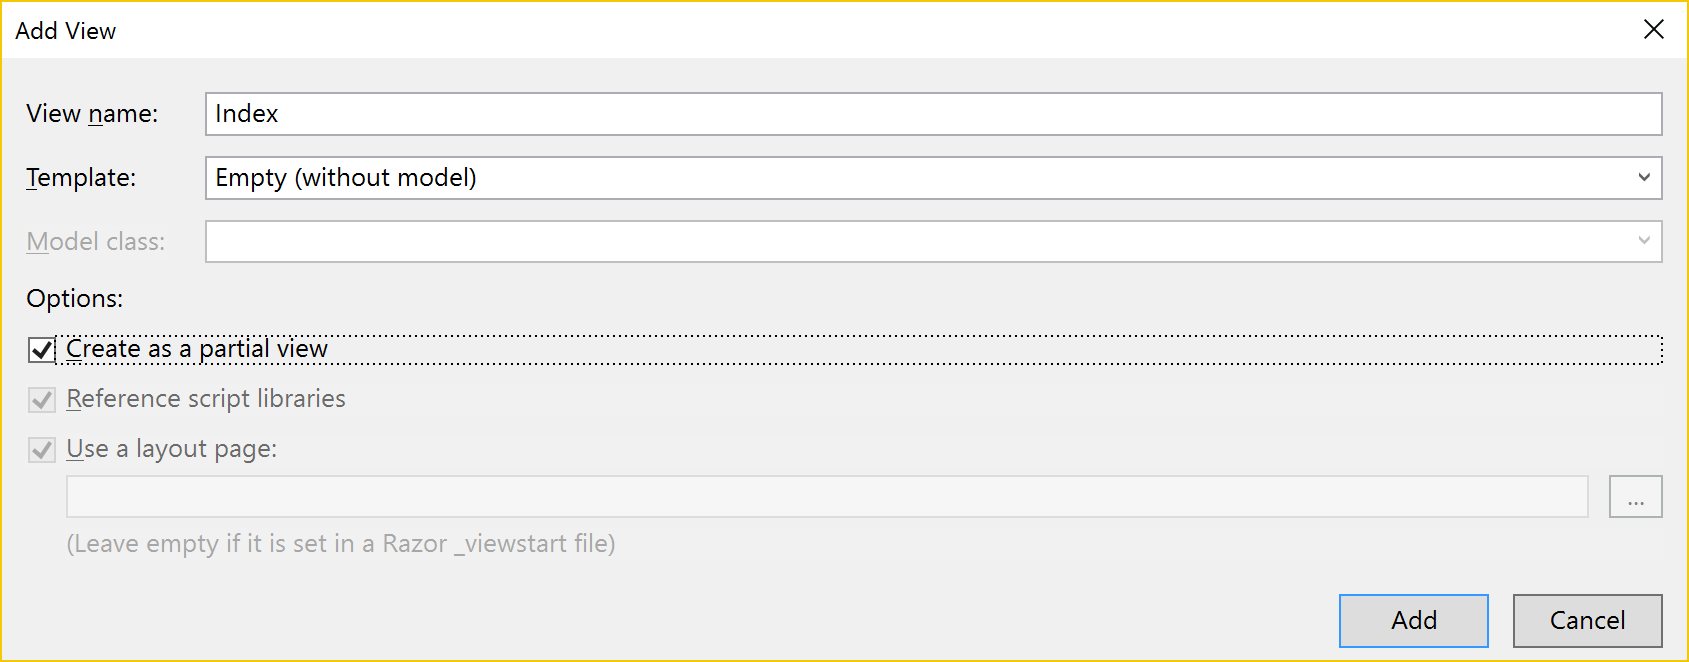
Now right click on the only method named Index() and select Add View from the Options Menu. The window which opens on this action is similar to the one as show in the image below. Please select all the options as it is showing in the image and Click Add.

P1686_002

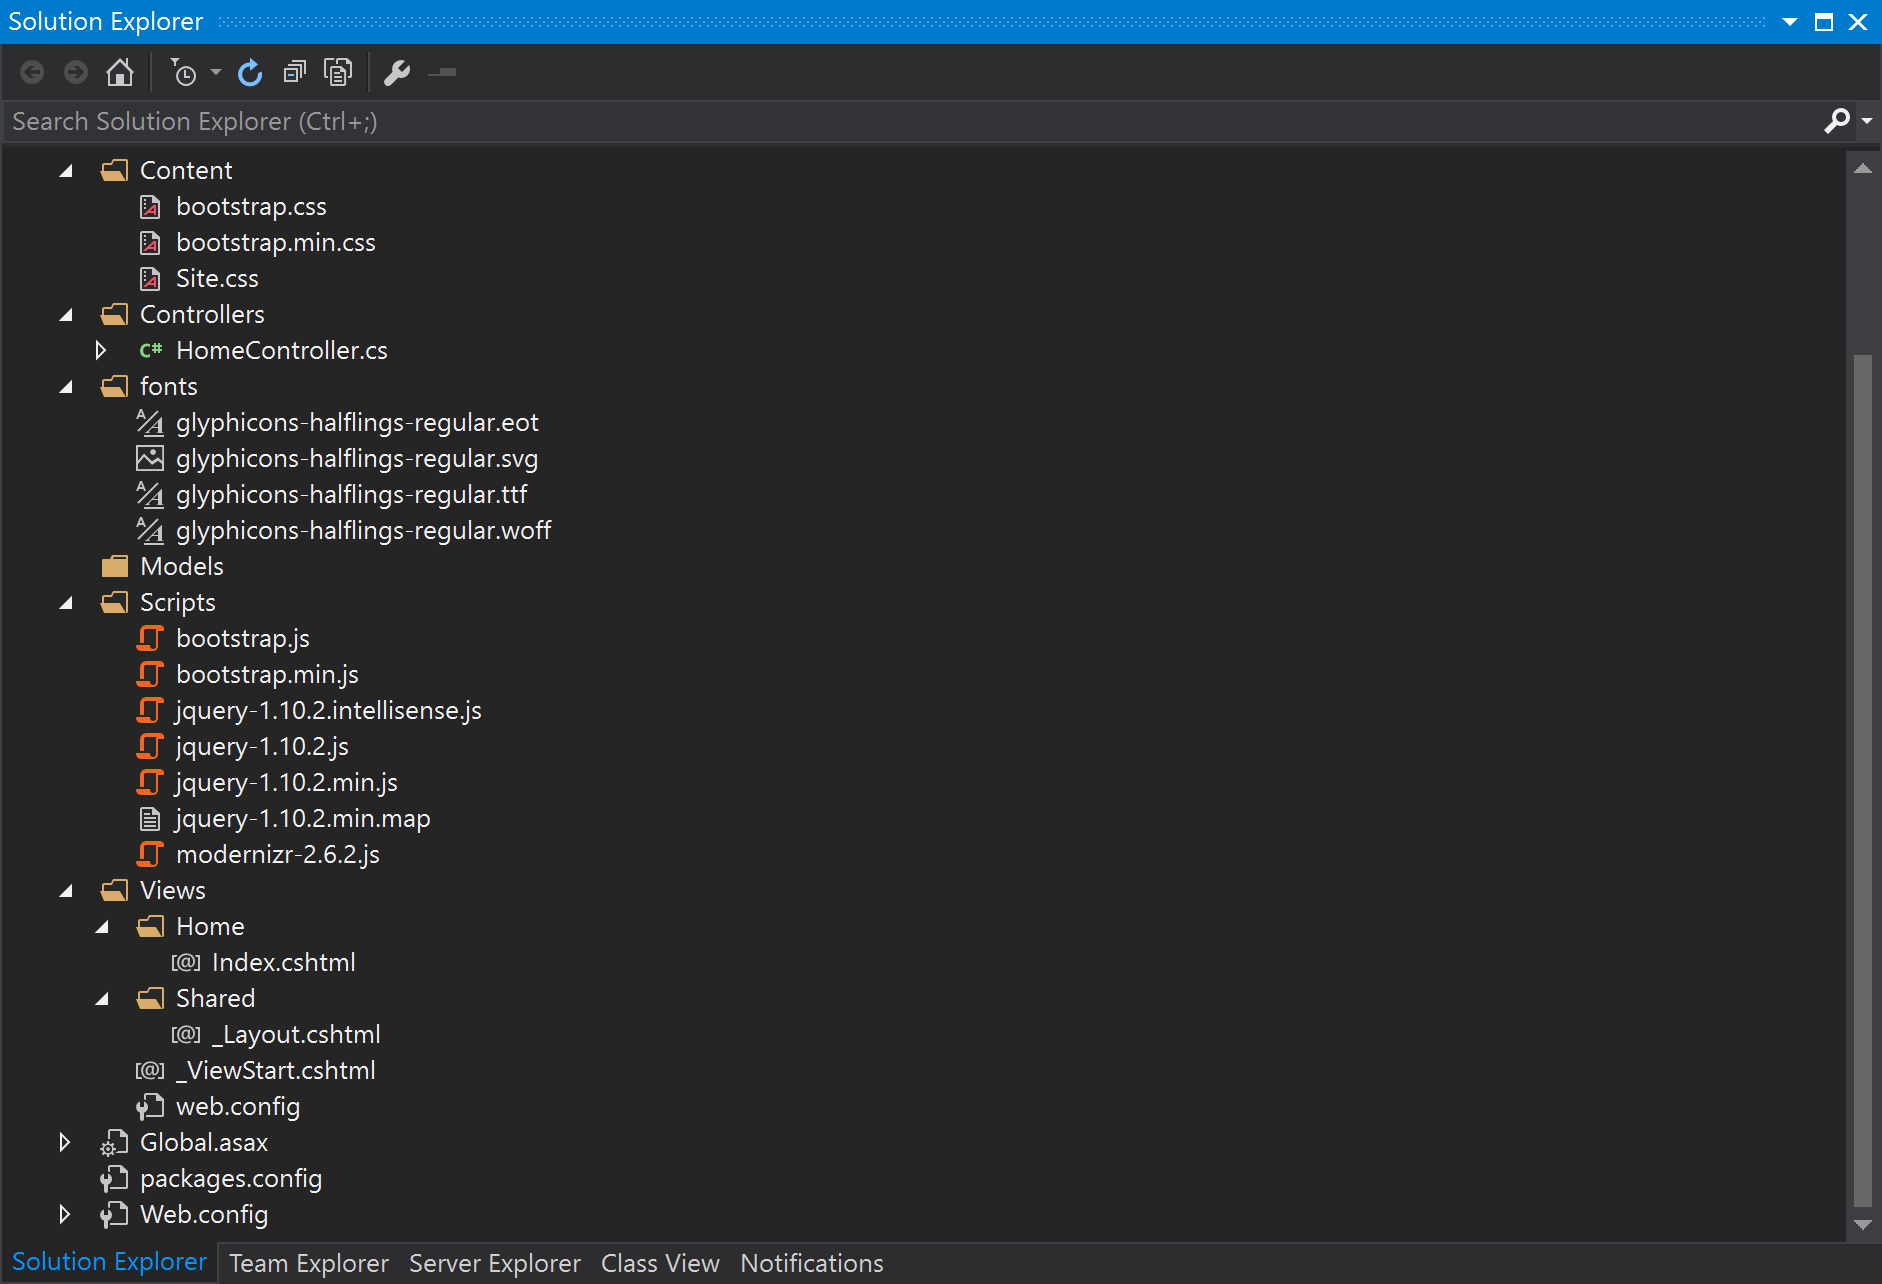
At this point a few new files and references are added to your project, you can see that in the image below (don’t worry we are going to remove many of them soon). The only important files for for us where we have to focus are Views -> Home -> Index.cshtml and Views -> Shared -> _Layout.cshtml

P1686_003

Say Hello to World …

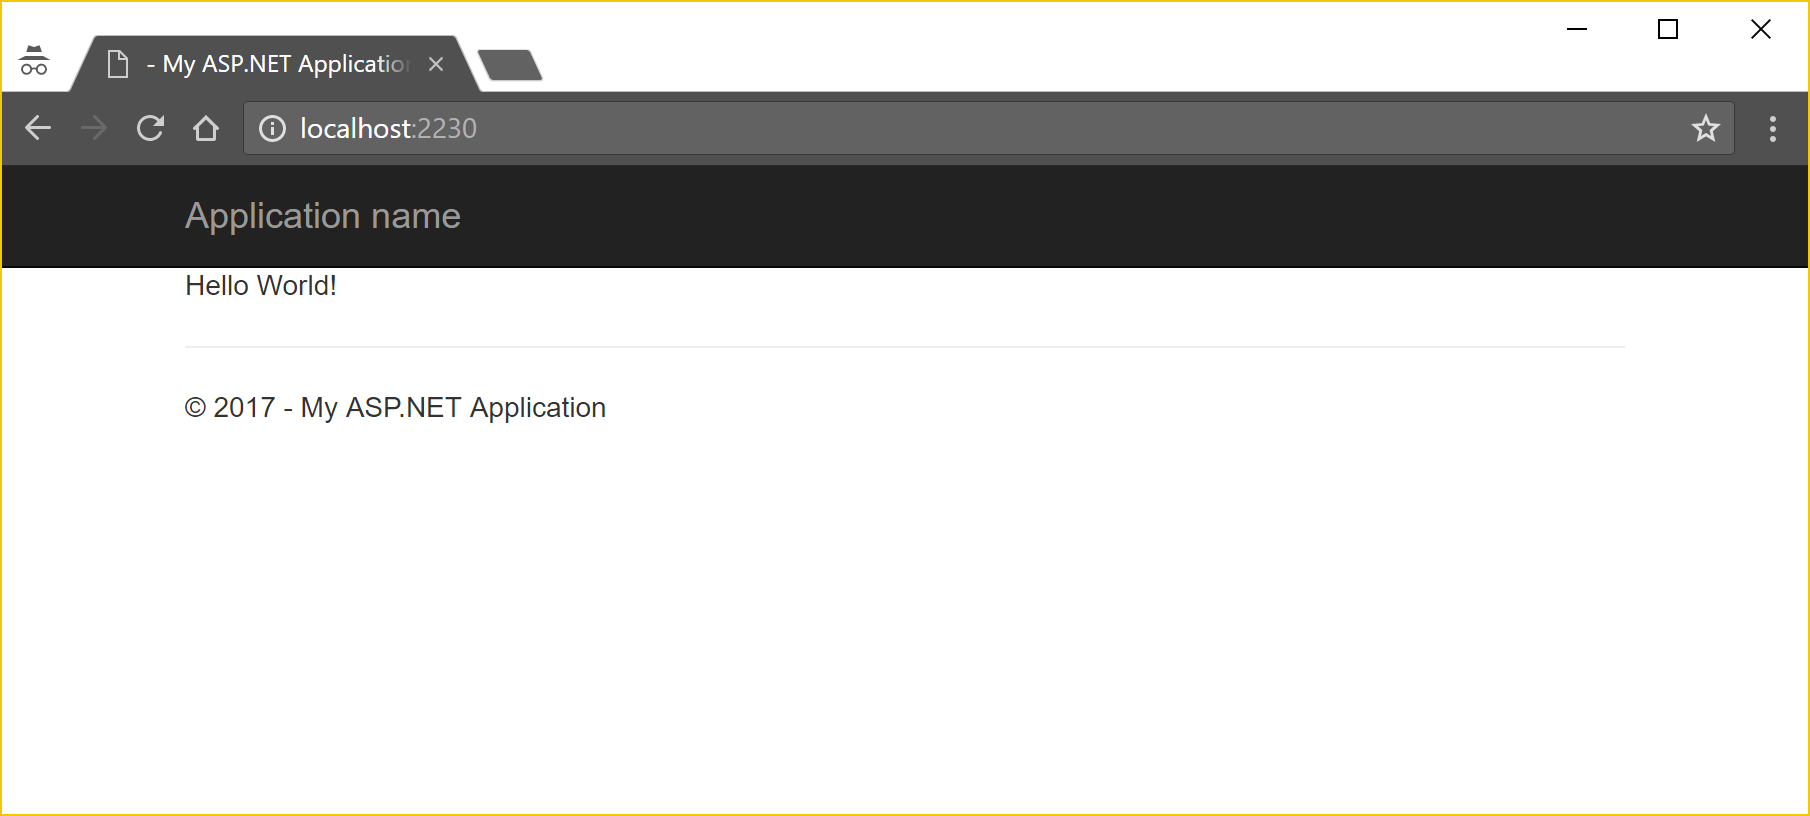
You have to open the Index.cshtml and Enter any text you wish, for me, it’s the 2 worlds of love every programmer knows “Hello World!”. Once you are done you can hit your favorite function key (F5) to run the project and see the output. Yups … you have your first page displayed in the default browser (Sorry! Google Chrome) something like this and your message surrounded by the clutter of default template something like this.

P1686_004

Before you start thinking …

What the hack! … why all this efforts and it took 2 posts for you to reach to this point. Man! you might have selected a MVC template in place of Empty one to begin with, but wait, before you get that idea, answer the simple question … Where is the fun in that?

Another point here, as I have told you in my previous post, we want a minimal project and now I am telling you that we are going to even remove the files and references which are required but will be acquired differently. Be patient and follow the lead … In the upcoming posts you will almost acquire the taste of this.

I am not saying that its all good till here but, remember that, there is a comment box below here, where you can argue whatever your ideas are.

Your feedback is much appreciated and will try to correct and improvise as much as possible. I will post the links for the next post in this series here as soon as they become available.

Series Links

Part 1 Part 3 Part 4 Part 5 Part 6 Part 7 Part 8 Part 9 Part 10 Part 11

AngularJS with ASP.Net MVC (Part 1)

A step by step tutorial on how to use AngularJS with ASP.Net MVC

Introduction

There are numerous articles and tutorials about this on the web and even on YouTube, none of them were complete and as satisfying as I wanted them to be. Using AngularJS with ASP.net MVC is a well talked topic and I have drafted a series of posts which will show you how I have done it myself in many of the projects during my learning of Angular and implementing in the small to large scale web applications.

Getting Started

I am going to use Visual Studio 2015 with a few Extensions for this series. Here is the link for you to download these extensions:

  1. Web Essentials
  2. Productivity Power Tools

Along with that you will require to have node.js and bower package manager installed for getting the required JavaScript libraries. For the starting point here we are going to use a minimal project template, so that I can add the required libraries and components as and when required. This makes the learning easy and the project as lean as possible. The primary language for the project is going to be C#, but you can use VB.Net if you are comfortable with that. I assume that you have a prior knowledge of ASP.Net MVC and JavaScript and also aware of AngularJS in some extent, because I will not be touching all the concepts of these technologies here in this series. Once you have all the required components installed, you are ready to continue on this tutorial.

Continue reading AngularJS with ASP.Net MVC (Part 1)

How To: Install Ubuntu in VMWare Player

Install Ubuntu in VMWare Player

When someone is looking for a development or test environment where he don’t want to disturb his current setup by installing the additional software, the virtualization is the best thing, which comes in his mind. There are many virtualization platforms out there in the market like VMWare and Hyper-V etc. I use the VMWare extensively for my development environments, like PHP Development Environment or the SharePoint Development Environment.

In case you, are interested in similar sort of setup, all you need is to buy the VMWare Workstation (I personally recommend, get it from here) or use one of the many free / opensource virtualization platforms like VirtualBox. Here with this post I am demonstrating the setup of the Ubuntu (Download Ubuntu) Linux as guest OS in VMWare Player (it will be similar for the VMWare Workstation). You can follow the below video see the setup instructions.

As it is shown in the video above the installation steps are very much similar to the one which anybody will follow, while installing any OS in physical machine. The only thing which you need to learn is what should be the configuration of the Virtual Machine you are creating. There are people out there who use this kind of virtualization to even run a full fledged development environment. This helps them separate out there development environment with the general use environment, keeping there host machine neat and clean. One more benefit, as identified by many people is that you can easily migrate one environment from one machine to another machine with all its configurations.

Hope you will enjoy your virtual environment whether it is for development or testing or whatever purpose it solves for you.

How To: Quickly Create Multiple VMs in VMWare Workstation

Quickly Create Multiple VMs in VMWare Workstation

Recently, I got a requirement to create an environment for a proof of concept up and running very quickly. I was required to create a setup which contained around 9 VMs running Ubuntu Linux OS. As it was a setup which was not concerning about the performance of the individual machines, but to demonstrate a network infrastructure and the system connectivity layout. So, you may ask what is the problem then … go and create. But there was not a single problem:

  1. The problem was that to get 9 machines all together in a short period of time was difficult.
  2. The requirement was for a short span of time, just to demonstrate the infrastructure.
  3. Creating the multiple machines of same configuration is a bit time consuming task, where we were already running out of time.

the solution was to use a virtualization platform like, Hyper-V VMWare etc. We picked VMWare Workstation as the platform for the virtualization. Now if we get one machine with enough power to run the virtualization and host these many machines, we can get it all running quickly. We identified a file server with a minimal utilization of RAM and Processor and decided to use it. Though the issues standing in front of us were getting fainted, but there was another issue. the file server we identified was at its peak of the Disc Space consumption. So to host 9 VMs say size of 10GB  each (Ubuntu base installation with all updated requires much lesser then that, around 6 – 7 GB and with 2 GB of RAM each), we required about 23 more GBs in the server. To free up that space we needed time to identify the unnecessary files which we didn’t had (we had already spent half day to reach to this position).

So the next thing was to somehow reduce the number of GBs required to create a VM was the only solution left. how we do that. Here comes the trickiest part in to the picture.

  1. Created a virtual machine with the base installation of the required OS with all patches and updates. (if you are interested in learning how to install a Ubuntu OS in VMWare you can follow this post). Here is the configuration of the base VM:
    • 10GB Virtual HDD
    • 2 GB RAM
    • NAT Connection
  2. Once the VM was ready, we switched off the VM and took a snapshot of the VM.
    W
    hat happens when we take the snapshot of the VM, it creates a differential file of the Virtual HDD (there are many other things it does, but we are interested only in this) leaving the original file as it is.
  3. In Microsoft windows there is a feature of creating the symbolic links of the files and folder. you can use this links files as you are using the original files and the modifications to the contents of the link will effect the contents of the original file.
    We used hard links to create 8 more replicas of the HDD from the first base VM. Here is the command which you should execute with the administrator privileges:

    mklink /h <target_file_name_with_path> <source_file_name_with_path>
  4. Once the copies of the HDDs were available we just need to create new VMs using these existing HDDs and take a snapshot immediately, before power up.
    Note: If you forget the snapshot part of the copy, before powering up any VM for the first time you may end up wasting all of your efforts.

If you carefully, follow the above steps you will be able to run all the VMs in parallel with a single HDD (individual differential files), making it use the minimal space required on the host and wasting the time in copy paste of the VM in whole (around 7 GB).

Using this setup, we were able to fit all the VMs in about 30GB while running in place of 90GB of initial requirement. I hope this technique will be helpful some day to someone. Please leave your comments below in case you find this helpful.

Follow me :

youtubefacebooktwittergoogleplus

How To: Setup PHP Development Environment in Ubuntu

Setup PHP Development Environment in Ubuntu

I have produced a video on how to Setup PHP Development Environment in Ubuntu Linux. It covers the below topics:

  1. Installation of Apache Web Server
  2. Installation of PHP
  3. Installation of MySQL Database Server
  4. Installation of Development Tools
    • MySQL Workbench
    • Komodo IDE

You can download the complete installation instructions here.

Please find the same video here:

Follow me :

youtubefacebooktwittergoogleplus